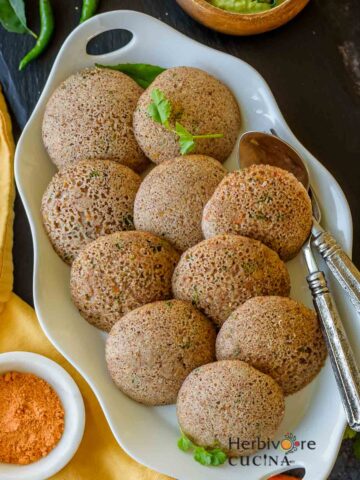
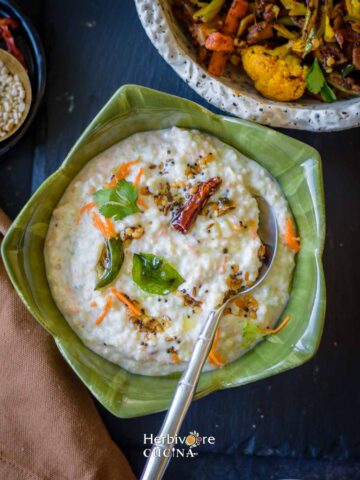
Rava idli is a soft, fluffy steamed cake from South India made with semolina (rava), yogurt, and a fragrant tempering of mustard seeds, curry leaves, and cashews — ready in minutes with no fermentation or grinding required.

Breakfast is always such a fun part of the day. And yet, it can easily become one of the most stressful part too. For us, it is generally a mix of Indian and American dishes.
We love these ragi idlis, parathas, upma and poha as much as we enjoy pancakes, waffles and hashbrowns. And with just these two cuisines we are able to have plenty of options each week.
While some of these dishes need planning, soaking and fermentation; rava idli is a great option all the time. It comes together in minutes and needs no soaking or grinding. Plus, no fermentation helps make them super quickly. This recipe is the one that my grandmother always made at home. And we enjoyed it with coconut cilantro chutney and sambar.
Jump to:
What is Rava Idli
Rava idli is a steamed South Indian cake made from semolina (rava or sooji) rather than the traditional rice and lentil batter. It is a no-fermentation, no-grinding alternative to classic idli that comes together in under 30 minutes — making it one of the most practical South Indian breakfast recipes you can make on a weekday morning.
The batter is built on roasted semolina, thick yogurt, and a fragrant tempering of mustard seeds, curry leaves, green chilli, ginger, and toasted cashews. A small amount of ENO fruit salt or baking soda added just before steaming gives the idlis their light, airy texture without any overnight fermentation.
Rava idli originated in Bangalore during World War II, when rice rationing led MTR (Mavalli Tiffin Rooms) — one of the city's most beloved restaurants — to develop a semolina-based substitute. The dish proved so popular that it became a permanent fixture on the menu and eventually a staple across South Indian households and tiffin centers.
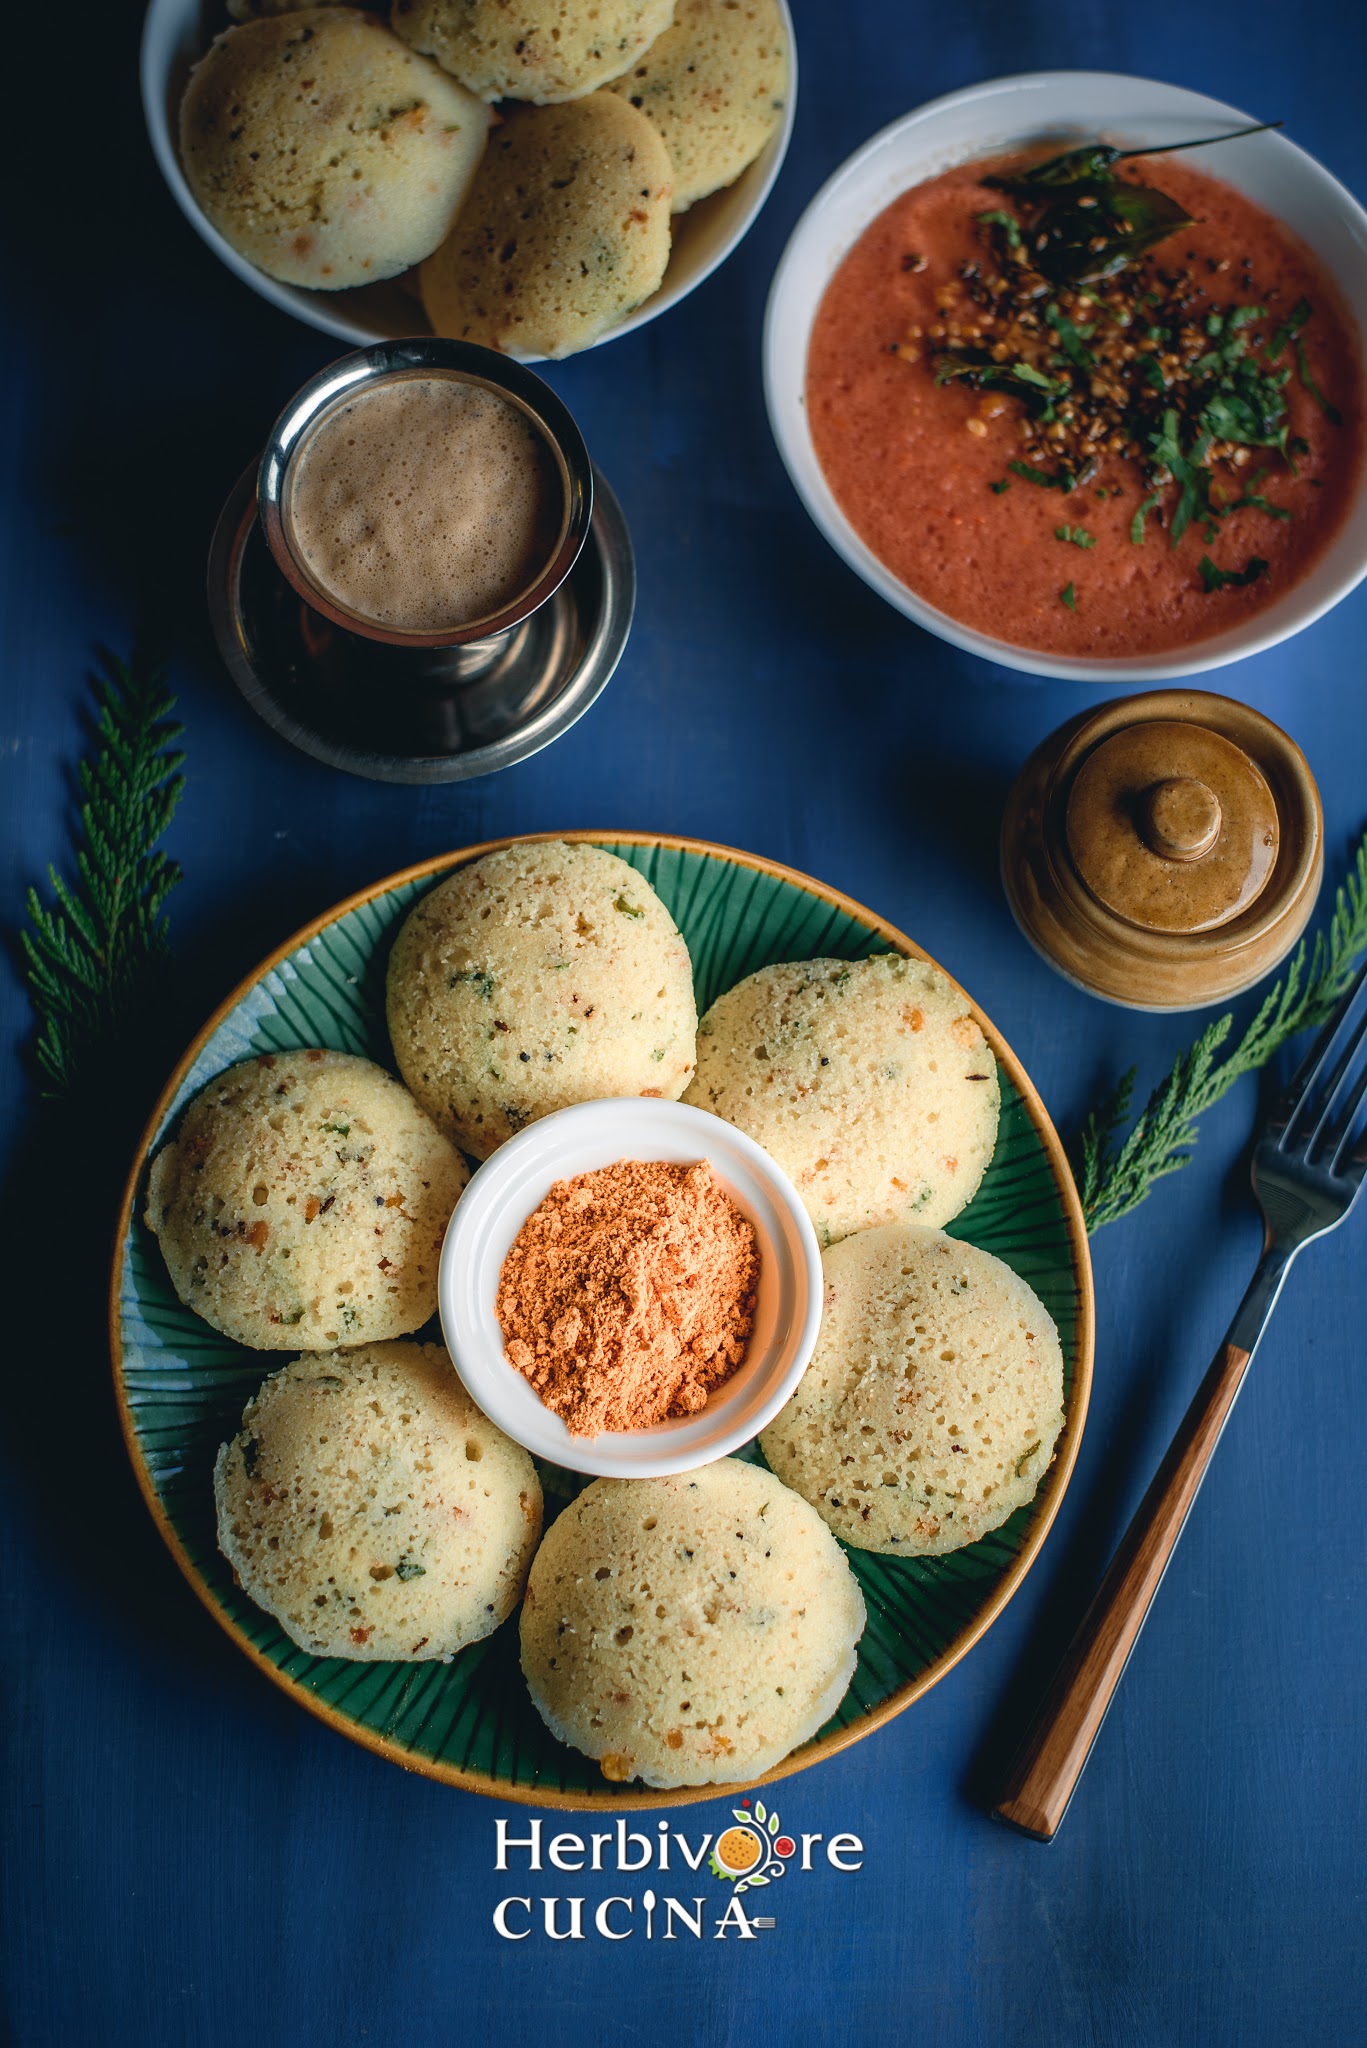
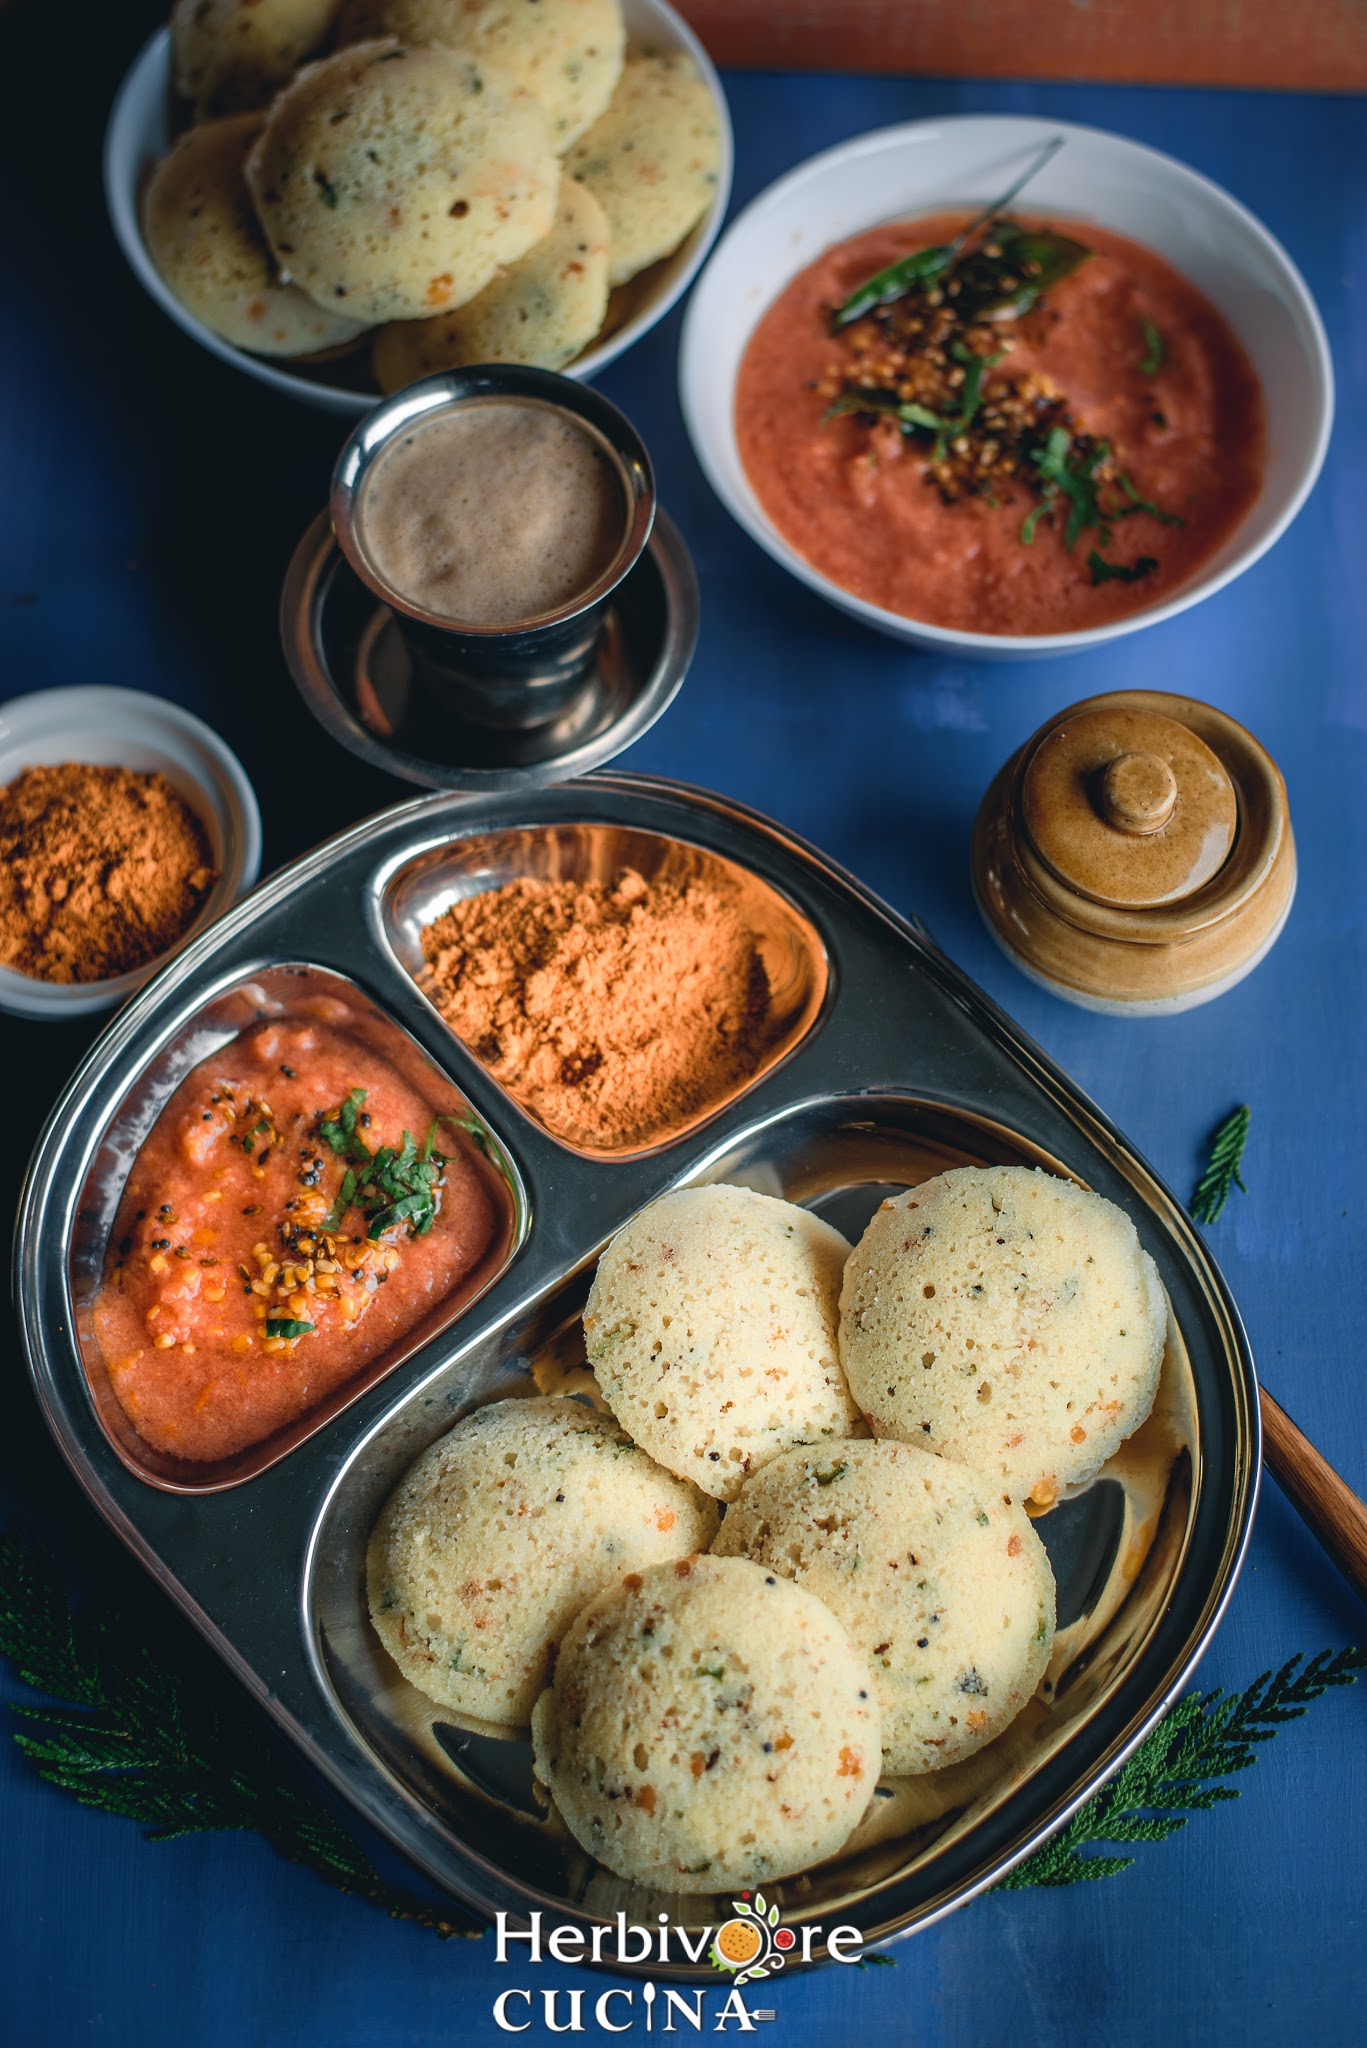
Today it is served as a breakfast or snack alongside coconut chutney, sambar, and gun powder, and is particularly popular in Karnataka. Because it requires no advance preparation, it has become a go-to recipe for busy mornings, lunchboxes, and last-minute guests.
Why this recipe works
No fermentation, no compromise. Most no-ferment idli recipes produce something that is technically an idli but texturally disappointing — dense, flat, or gummy. This recipe gets around that by combining two leavening actions: the acidity of yogurt reacting with ENO fruit salt produces carbon dioxide bubbles that aerate the batter from the inside, while the rested, well-roasted rava gives the structure to hold that lift through steaming. The result is a soft, fluffy idli that doesn't taste like a shortcut.
Roasting is doing more work than you think. Dry-roasting the semolina before mixing drives off excess moisture, deepens the flavor, and — most importantly — pre-cooks the starch granules slightly so they absorb the yogurt evenly during the rest period. Skip this step and the batter stays grainy; over-roast it and the idlis turn dry.
The tempering goes in first, not on top. Unlike some recipes that add a garnish tadka at the end, here everything is cooked into the batter itself. Every bite carries the flavor rather than just the surface, and the cashews toast in the ghee to a deep golden crunch that holds up through steaming.
The 15-minute rest is non-negotiable. Semolina is thirsty. Straight after mixing, the batter looks too loose — but given time, the rava absorbs the yogurt and swells into a thick, scoopable consistency. Trying to steam it immediately produces idlis that are wet in the center and don't hold their shape on the plate.
Timing the ENO is everything. ENO activates on contact with moisture and acid. Once it hits the batter, you have a narrow window — no more than two minutes — before the bubbles dissipate. Having the steamer already hot, the moulds already greased, and the stand already in position before you add the ENO is what separates light, airy idlis from flat ones.
Ingredients and Substitutions
- Semolina (rava): This is the most important ingredient here. Regular rava works well, fine rava will work too. I roast it at home, but pre-roasted rava from the Indian store will work as well.
- Yogurt: Thick yogurt is great for the recipe. If you have tart (sour) yogurt at hand, it will be even better. I use this instant pot yogurt in the recipe. Keep it at room temperature to make it little sour before adding to the idli. For a vegan version, cashew yogurt or coconut curd both work well — avoid thin plant-based yogurts as they make the batter too loose.
- ENO: The leavening agent that makes this recipe instant. Plain, unflavored ENO is essential — fruit-flavored varieties will change the taste of the idlis. If ENO is unavailable, substitute with ½ teaspoon baking soda, though the rise will be slightly less dramatic. Do not use baking powder — it contains cornstarch and will affect the texture.
- Ghee: The perfect carrier of the South Indian style tempering is ghee. Oil is great for a Vegan version. I prefer my homemade ghee for the recipe but store bought works too. For a vegan version, coconut oil is the best substitute — it has a similarly high smoke point and adds a subtle flavor that works well with the South Indian spices. Any neutral oil (sunflower, avocado) works too but the flavor will be noticeably milder.
- Tempering ingredients: Urad dal, chana dal, mustard seeds, cumin seeds, asafetida, curry leaves and cashew pieces. Skip the cashews for a nut-free version. Add some ginger and green chili too, however it is optional. Roasted chana (dalia) is a good allergy-friendly substitute for cashews that gives a similar crunch without the richness.
See the recipe card for detailed ingredient information, measurements and nutrition.
How to make this recipe
1- Prep the Dal: Soak the chana dal in warm water for 10–15 minutes. Drain and set aside.
2- Prepare the Tempering- Heat ghee in a pan and add mustard seeds. Once they pop, add asafetida and cumin seeds.
3- Sauté: Add the urad dal and the soaked chana dal. Mix well and sauté until the dal turns brown.
4- Finish the tempering: Add the curry leaves, green chilies, cashews, and ginger, and cook for 4–5 minutes.
5- Roast the Semolina: Add the rava (semolina) to the pan. Roast on low flame for 8–10 minutes, stirring constantly to prevent burning. Once fragrant, remove from heat and allow to cool.
6- Make the Batter: Mix in the salt, yogurt, and enough water to create a thick batter. Let the mixture rest for 15–20 minutes.
7- Prepare the Steamer: While the batter rests, heat water in your idli stand or pressure cooker base. Grease the idli plates with oil and set them aside.
8- Finalize Batter: Just before steaming, add ENO to the batter and mix well. The batter will bubble slightly. Add a little extra water if it seems too thick.
9- Steam: Divide the batter into the idli cavities and steam for 10–12 minutes.
10- Check and Serve: Test for doneness by inserting a skewer into the center—it should come out clean. Then remove the idlis and serve warm.
Serving Suggestions
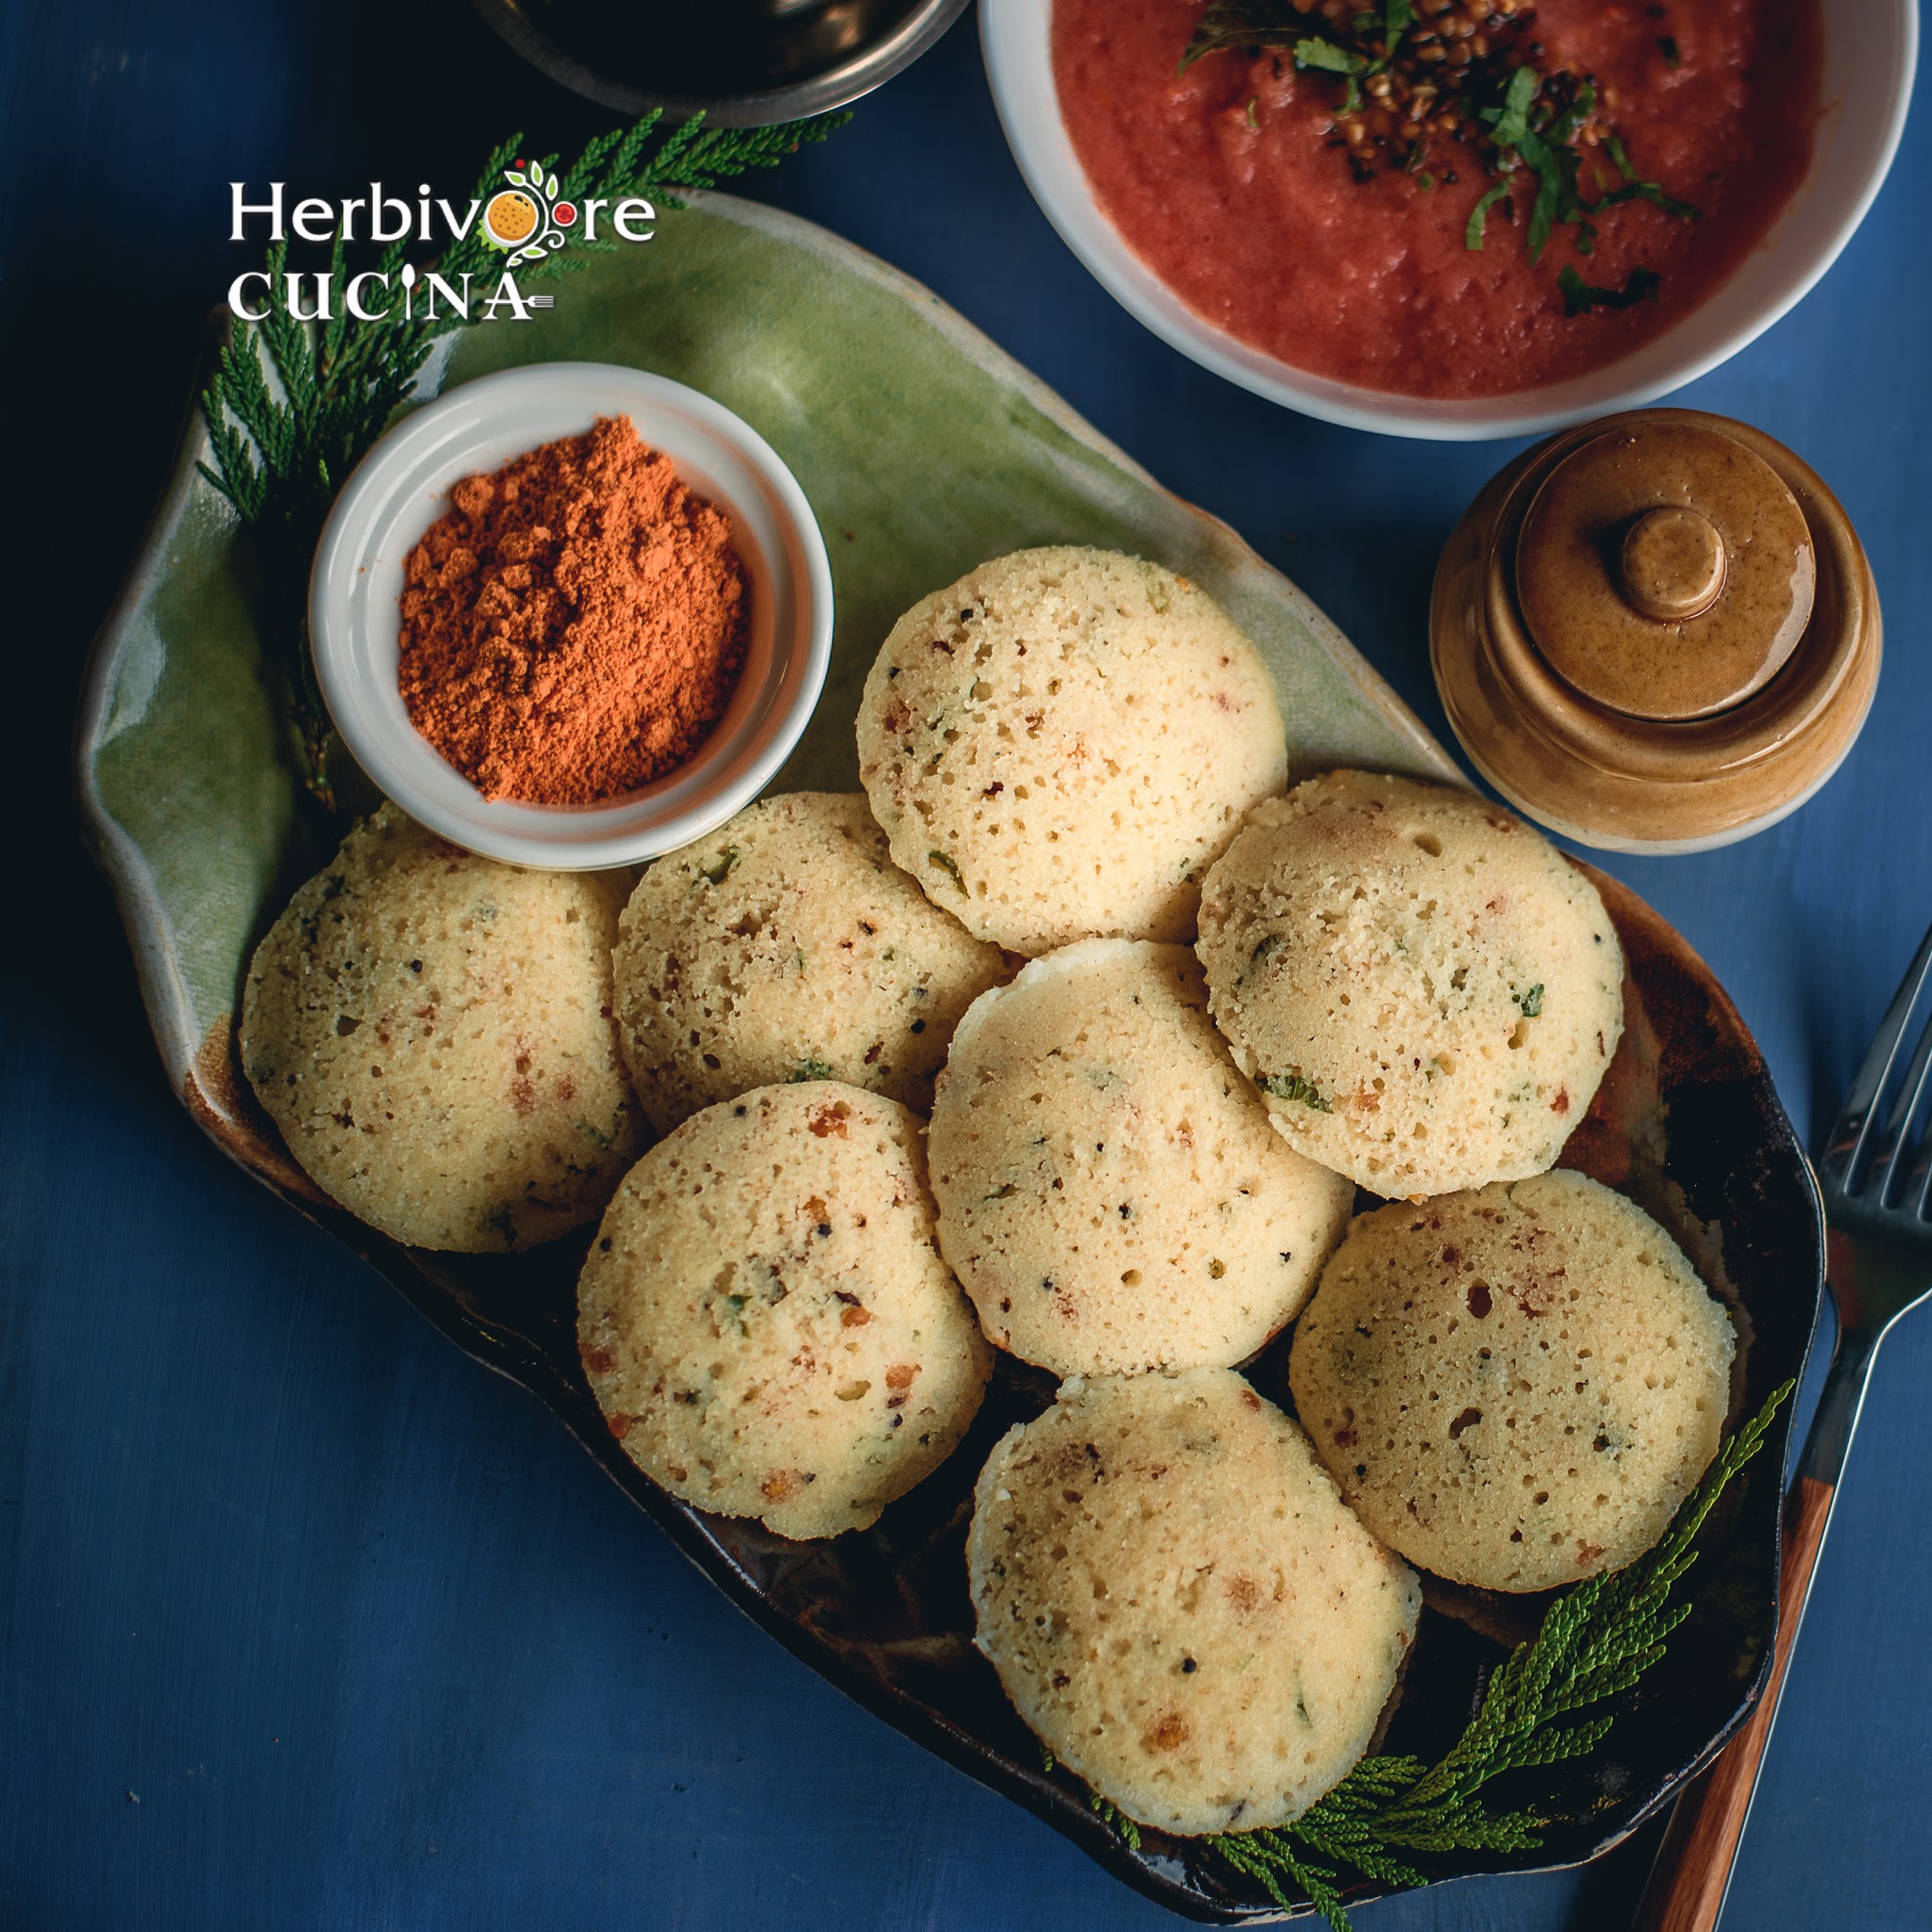
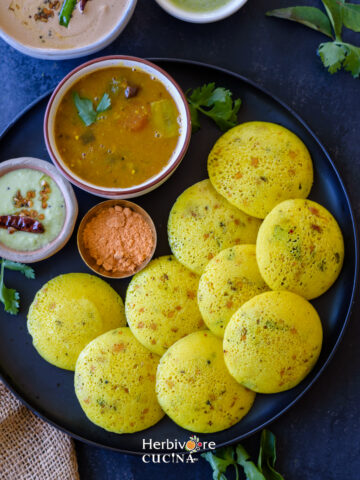
Rava idli is traditionally served as a breakfast or tiffin dish, and like most South Indian tiffin items, it really shines when paired with a combination of a wet dip and a dry chutney powder.
This idli is great with these homemade chutneys: Coconut Cilantro Chutney, Tomato Onion Chutney or Gun Powder Chutney. It pairs perfectly with this Lentil and Vegetable Sambar.
If making this as part of a South Indian meal; also make some quinoa bisibelebath or lemon rice and pineapple sheera. Also pair it with Indian filter coffee to round the meal.
Beyond Breakfast
Rava idli isn't limited to the morning. A few other ways to serve it:
- As a light lunch or snack with a bowl of rasam in place of sambar — the thin, peppery broth works beautifully as a dipping sauce
- As party finger food — make them in mini idli moulds, skewer with a toothpick, and serve with a trio of chutneys for a crowd-pleasing appetizer
- As a lunchbox item — rava idlis hold their texture better than rice idlis when packed, making them a reliable tiffin box option for kids and adults alike. Pack the chutney separately in a small container.
- Reheated the next day — re-steam leftover idlis for 5 minutes and serve with fresh chutney. They reheat far better than rice idlis, which tend to dry out. Or convert it to a different idli recipe similar to this podi idli recipe.
Expert Tips and Notes
Roast the Rava: Roast on medium-low heat, stirring continuously, until it turns fragrant and just begins to color — about 4–5 minutes. Under-roasted rava makes dense, sticky idlis. Even if you bought "roasted" rava, dry roasting it for 3–4 minutes until fragrant significantly improves the final texture of the idli.
Consistency Check: The batter should be thick but pourable. If it's too thin, the idlis will be flat; if too thick, they will be dry. Add your water gradually to get the perfect consistency.
Let the batter rest: After mixing rava and yogurt, rest the batter for 15–20 minutes. The rava absorbs the moisture and swells — don't skip this or your idlis will be grainy.
The "Eno" Hack: When using Fruit Salt (Eno), add it only right before you are ready to steam the idlis to ensure maximum fluffiness.
Don't over-steam: 12–15 minutes on medium heat is enough. Over-steaming makes rava idlis rubbery. To check doneness, insert a toothpick — it should come out clean and dry.
Keep the roasted mix ready: It is easy to make the roasted semolina mix and keep it ready. Avoid adding ginger and chili if you intend to do so. Keep this mix in the pantry for up to 2 months. Simply add the aromatics and yogurt and make the idli even quicker.
Recipe FAQs
Yes certainly. Simply use small stainless steel bowls to steam the idli. Alternatively, use silicone cupcake molds. Grease these and use them to steam the idli. Use a large pan with a perfect lid for steaming if you do not have the stand.
Rava idli is made with semolina and yogurt. ENO helps rise the batter instantly. Regular idli is made with fermented idli rice and lentil batter. Rava idli has a softer, more cake-like crumb compared to the denser chew of a traditional idli. The flavor is milder and less tangy, with the tempering of mustard seeds, curry leaves, cashews, and chilies doing most of the flavor work.
Yes certainly. Adding shredded or finely diced carrots, green beans, onions, peppers and cilantro is a great idea. Plus, it gives the idli some texture as well.
No! That is the beauty of "Instant" Rava Idli. Unlike traditional rice idlis that require hours of fermentation, this recipe uses baking soda (or fruit salt/Eno) to create immediate lift, making it perfect for quick breakfasts.
Hard or dry idlis are usually the result of overcooking or a batter that was too thick. Ensure you don't steam them for longer than the recommended 10–12 minutes. If the batter becomes too thick while sitting, add a splash of water before putting it into the idli molds.
More Idli Recipes
If you love this recipe, you'll want to try these idli variations next — from classic rice idli to creative twists that are just as quick and satisfying.

Love this recipe? Please leave a star rating in the recipe card below & if you REALLY like it, consider a review in the comments whilst you are there, thanks!

Rava Idli Recipe (Instant, No Fermentation)
Ingredients
For the Idli Batter
For the Tempering (Tadka)
- 2 tablespoon Ghee (or oil for a vegan option)
- 2 teaspoon Urad Dal (split black gram)
- 2 teaspoon Chana Dal (split bengal gram)
- ½ teaspoon Mustard Seeds
- 1 pinch Asafetida (Hing)
- 1 teaspoon Cumin Seeds
- 4-5 Fresh Curry Leaves
- 1-2 Green Chilies (finely minced)
- 1 inch Ginger (freshly grated)
- 2 tablespoon Cashews halved (optional, for crunch)
Instructions
- Prep the Dal: Soak the chana dal in warm water for 10–15 minutes. Drain and set aside.2 teaspoon Chana Dal
- Prepare the Tempering: Heat ghee in a pan and add mustard seeds. Once they pop, add asafetida and cumin seeds.2 tablespoon Ghee, ½ teaspoon Mustard Seeds, 1 pinch Asafetida, 1 teaspoon Cumin Seeds
- Sauté: Add the urad dal and the soaked chana dal. Mix well and sauté until the dal turns brown.2 teaspoon Urad Dal
- Finish the tempering: Add the curry leaves, green chilies, cashews, and ginger, and cook for 4–5 minutes.4-5 Fresh Curry Leaves, 1-2 Green Chilies, 2 tablespoon Cashews, 1 inch Ginger
- Roast the Semolina: Add the rava (semolina) to the pan. Roast on low flame for 8–10 minutes, stirring constantly to prevent burning. Once fragrant, remove from heat and allow to cool.1 ½ cups Rava / Semolina
- Make the Batter: Mix in the salt, yogurt, and enough water to create a thick batter. Let the mixture rest for 15–20 minutes.¾ cup Yogurt, 1 ½ teaspoon Salt, ¾ cup Water
- Prepare the Steamer: While the batter rests, heat water in your idli stand or pressure cooker base. Grease the idli plates with oil and set them aside.
- Finalize Batter: Just before steaming, add ENO to the batter and mix well. The batter will bubble slightly. Add a little extra water if it seems too thick.½ teaspoon Eno
- Steam: Divide the batter into the idli cavities and steam for 10–12 minutes.
- Check and Serve: Test for doneness by inserting a skewer into the center—it should come out clean. Then remove the idlis and serve warm.
Notes
- Roast the Rava: Roast on medium-low heat, stirring continuously, until it turns fragrant and just begins to color — about 4–5 minutes. Under-roasted rava makes dense, sticky idlis. Even if you bought "roasted" rava, dry roasting it for 3–4 minutes until fragrant significantly improves the final texture of the idli.
- Consistency Check: The batter should be thick but pourable. If it's too thin, the idlis will be flat; if too thick, they will be dry. Add your water gradually to get the perfect consistency.
- Let the batter rest: After mixing rava and yogurt, rest the batter for 15–20 minutes. The rava absorbs the moisture and swells — don't skip this or your idlis will be grainy.
- The "Eno" Hack: When using Fruit Salt (Eno), add it only right before you are ready to steam the idlis to ensure maximum fluffiness.
- Don't over-steam: 12–15 minutes on medium heat is enough. Over-steaming makes rava idlis rubbery. To check doneness, insert a toothpick — it should come out clean and dry.
- Keep the roasted mix ready: It is easy to make the roasted semolina mix and keep it ready. Avoid adding ginger and chili if you intend to do so. Keep this mix in the pantry for up to 2 months. Simply add the aromatics and yogurt and make the idli even quicker.

Leave a Reply