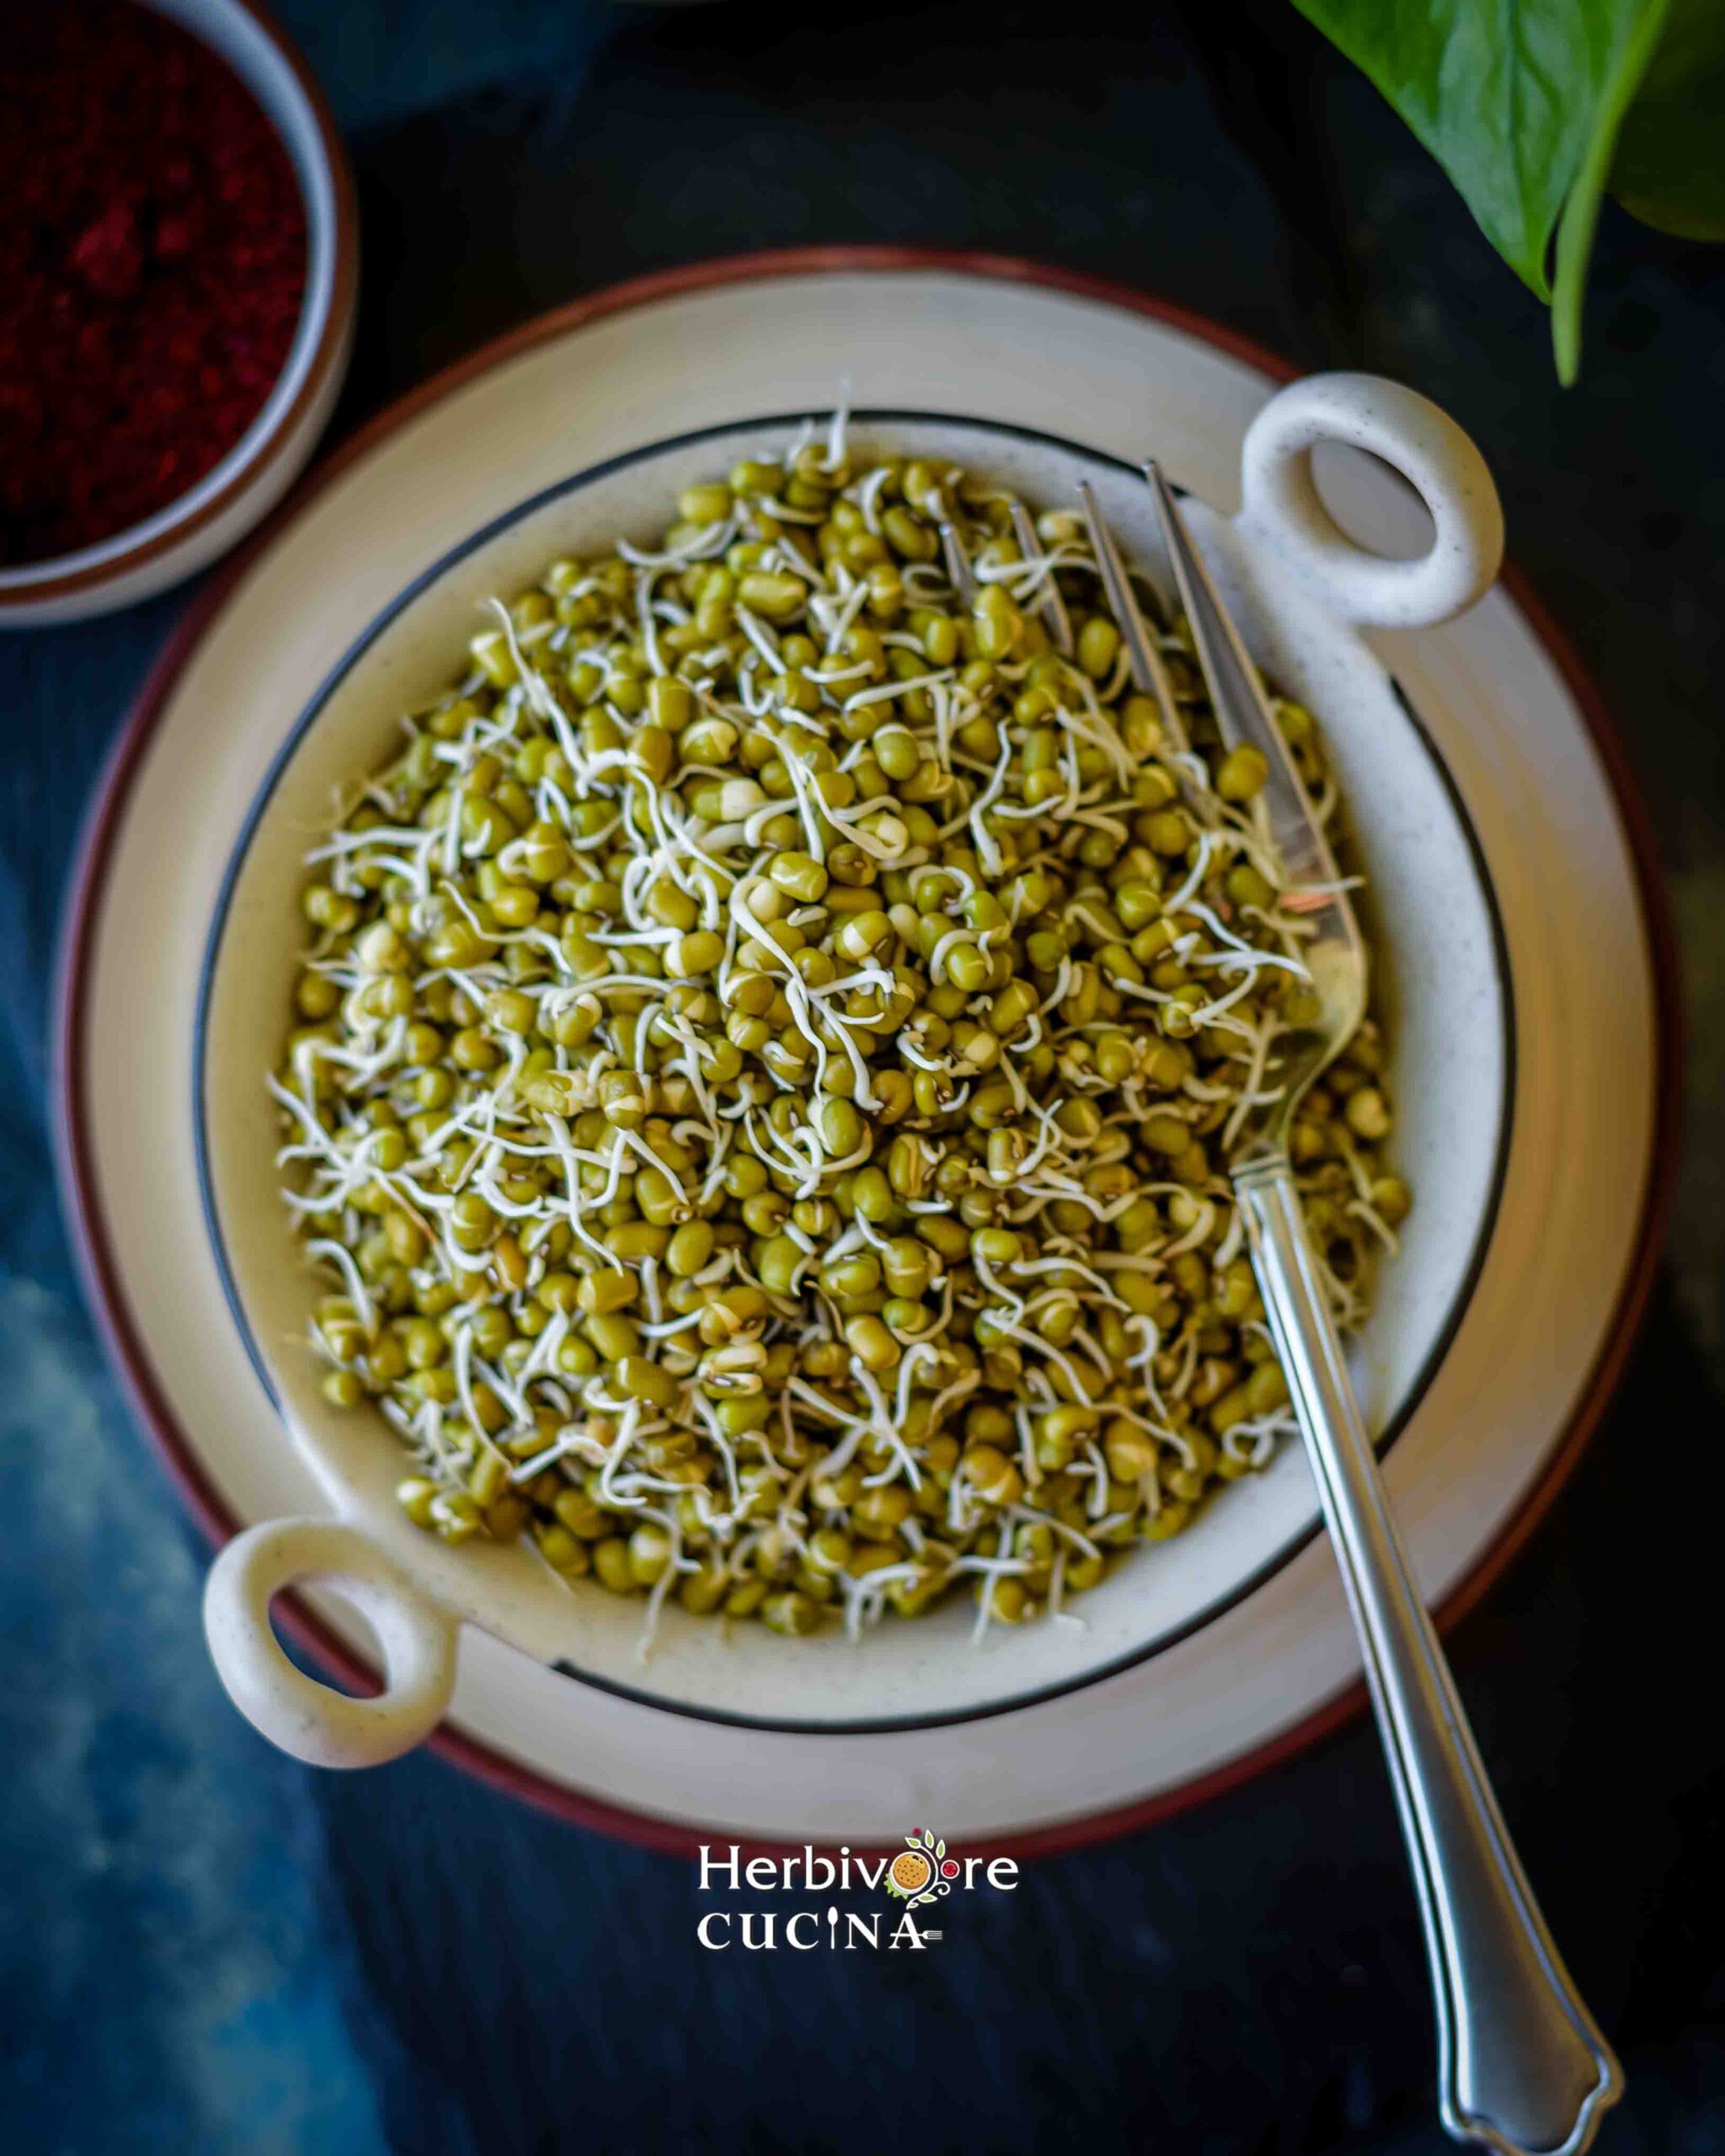
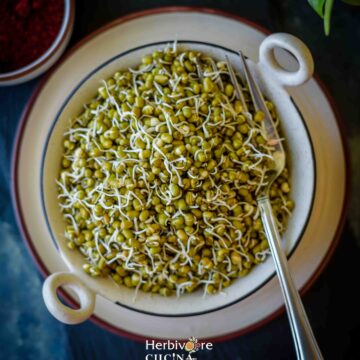
Flavorful and power packed; Moong Sprouts are a breeze to make at home.
No complex requirements and they are so much better than the store bought ones. Cost effective, minimal active time and super versatile in use too.
There are so many recipes that are super simple, yet we end up buying for many reasons. Either we do not have the time or the knowledge to make these ourselves, find store bought cost effective or we simply end up being lazy.
Wondering what I am talking about? This list includes cilantro chutney, chili garlic paste, ghee and yogurt to name a few.
While there is so much conversation whether or not these should be made at home (not necessarily from scratch) or simply bought off the shelves, I mostly like to make them all at home.
Along with this comes sprouts. Whether we are talking about moong beans, matki beans or even chana and black-eyed peas; it is pretty easy to sprout them all at home. So skip the packed ones at the Indian store next time and make your own!
Jump to:
What is Moong Beans
Moong beans (botanically Vigna radiata) or Sabut Moong in Hindi are packed with nutrition. One of the best sources of plant based protein, these tiny green beans are full of essential amino acids and antioxidants.
They can be used in several ways from making misal or bhel to adding into soups, curries and so on. Sprouts also make a great addition to salads and can be enjoyed raw with some salt, pepper and lemon juice.
Why sprout Moong
While it is a powerhouse by itself, sprouting moong changes their nutritional composition.
Sprouting moong beans reduces its calories and further increases the amount of Vitamin C in it. It also has more free amino acids and antioxidants.
Lastly, it reduces the phytic acid, which is an antinutrient. Thus, it makes a great ingredient to have at hand after sprouting.
Why this recipe works
- It needs just two ingredients; moong beans and water.
- We need only a few minutes of active time; the remaining time is just soaking or sprouting time.
- The recipe yields perfect sprouts in 3 days.
- However, the sprouts can be used on day 1 or 2 too.
- These are perfect to enjoy raw or cooked.
- We can scale the recipe up or down based on how much end product we desire.
- Preservative free compared to the ones in the store that use some form of preservation to keep them good longer.
- Pocket friendly compared to store bought ones.
- The same method works for other beans too.
Ingredients and Substitutions
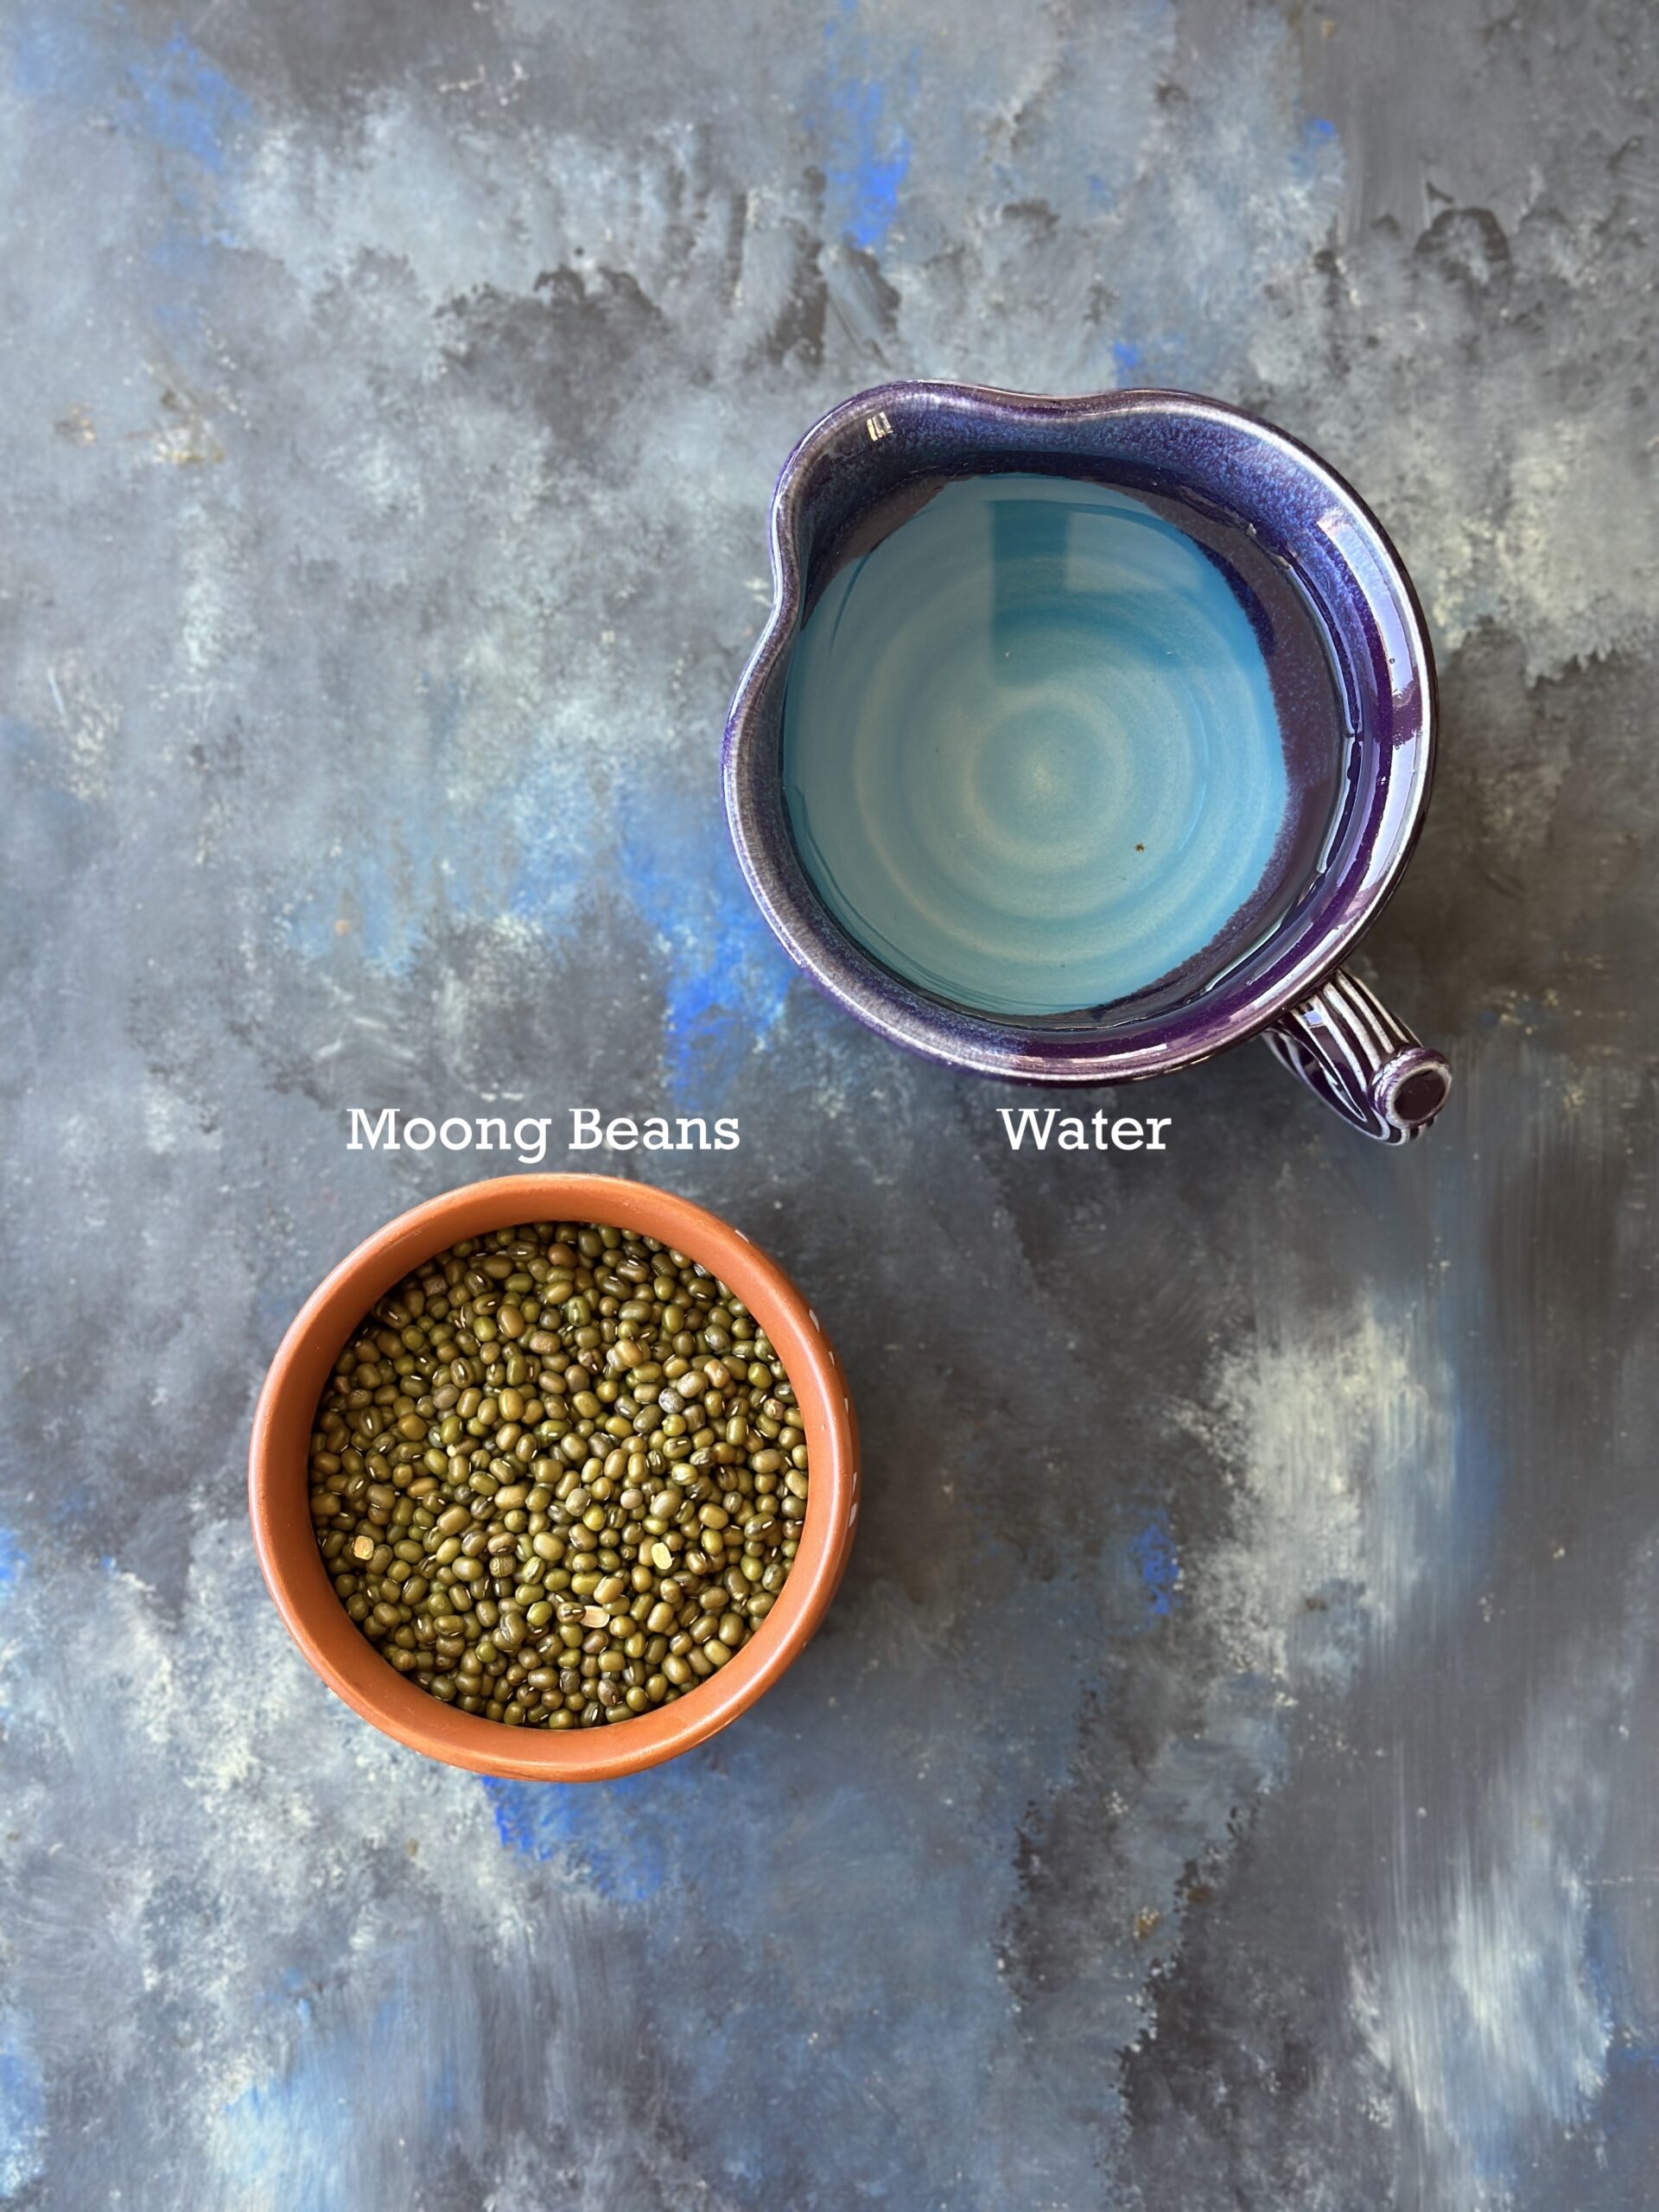
- Moong: We need moong beans for the recipe. It is best to use fresh moong that are considerably of larger size for the best moong. However, the recipe can be made with other beans like matki, black eyed peas, chana etc.
- Water: We use some water for soaking the moong beans. I like to use warm water so the moong softens quickly. However, room temperature water works too.
See the recipe card for detailed ingredient information, measurements and nutrition.
How to make this recipe
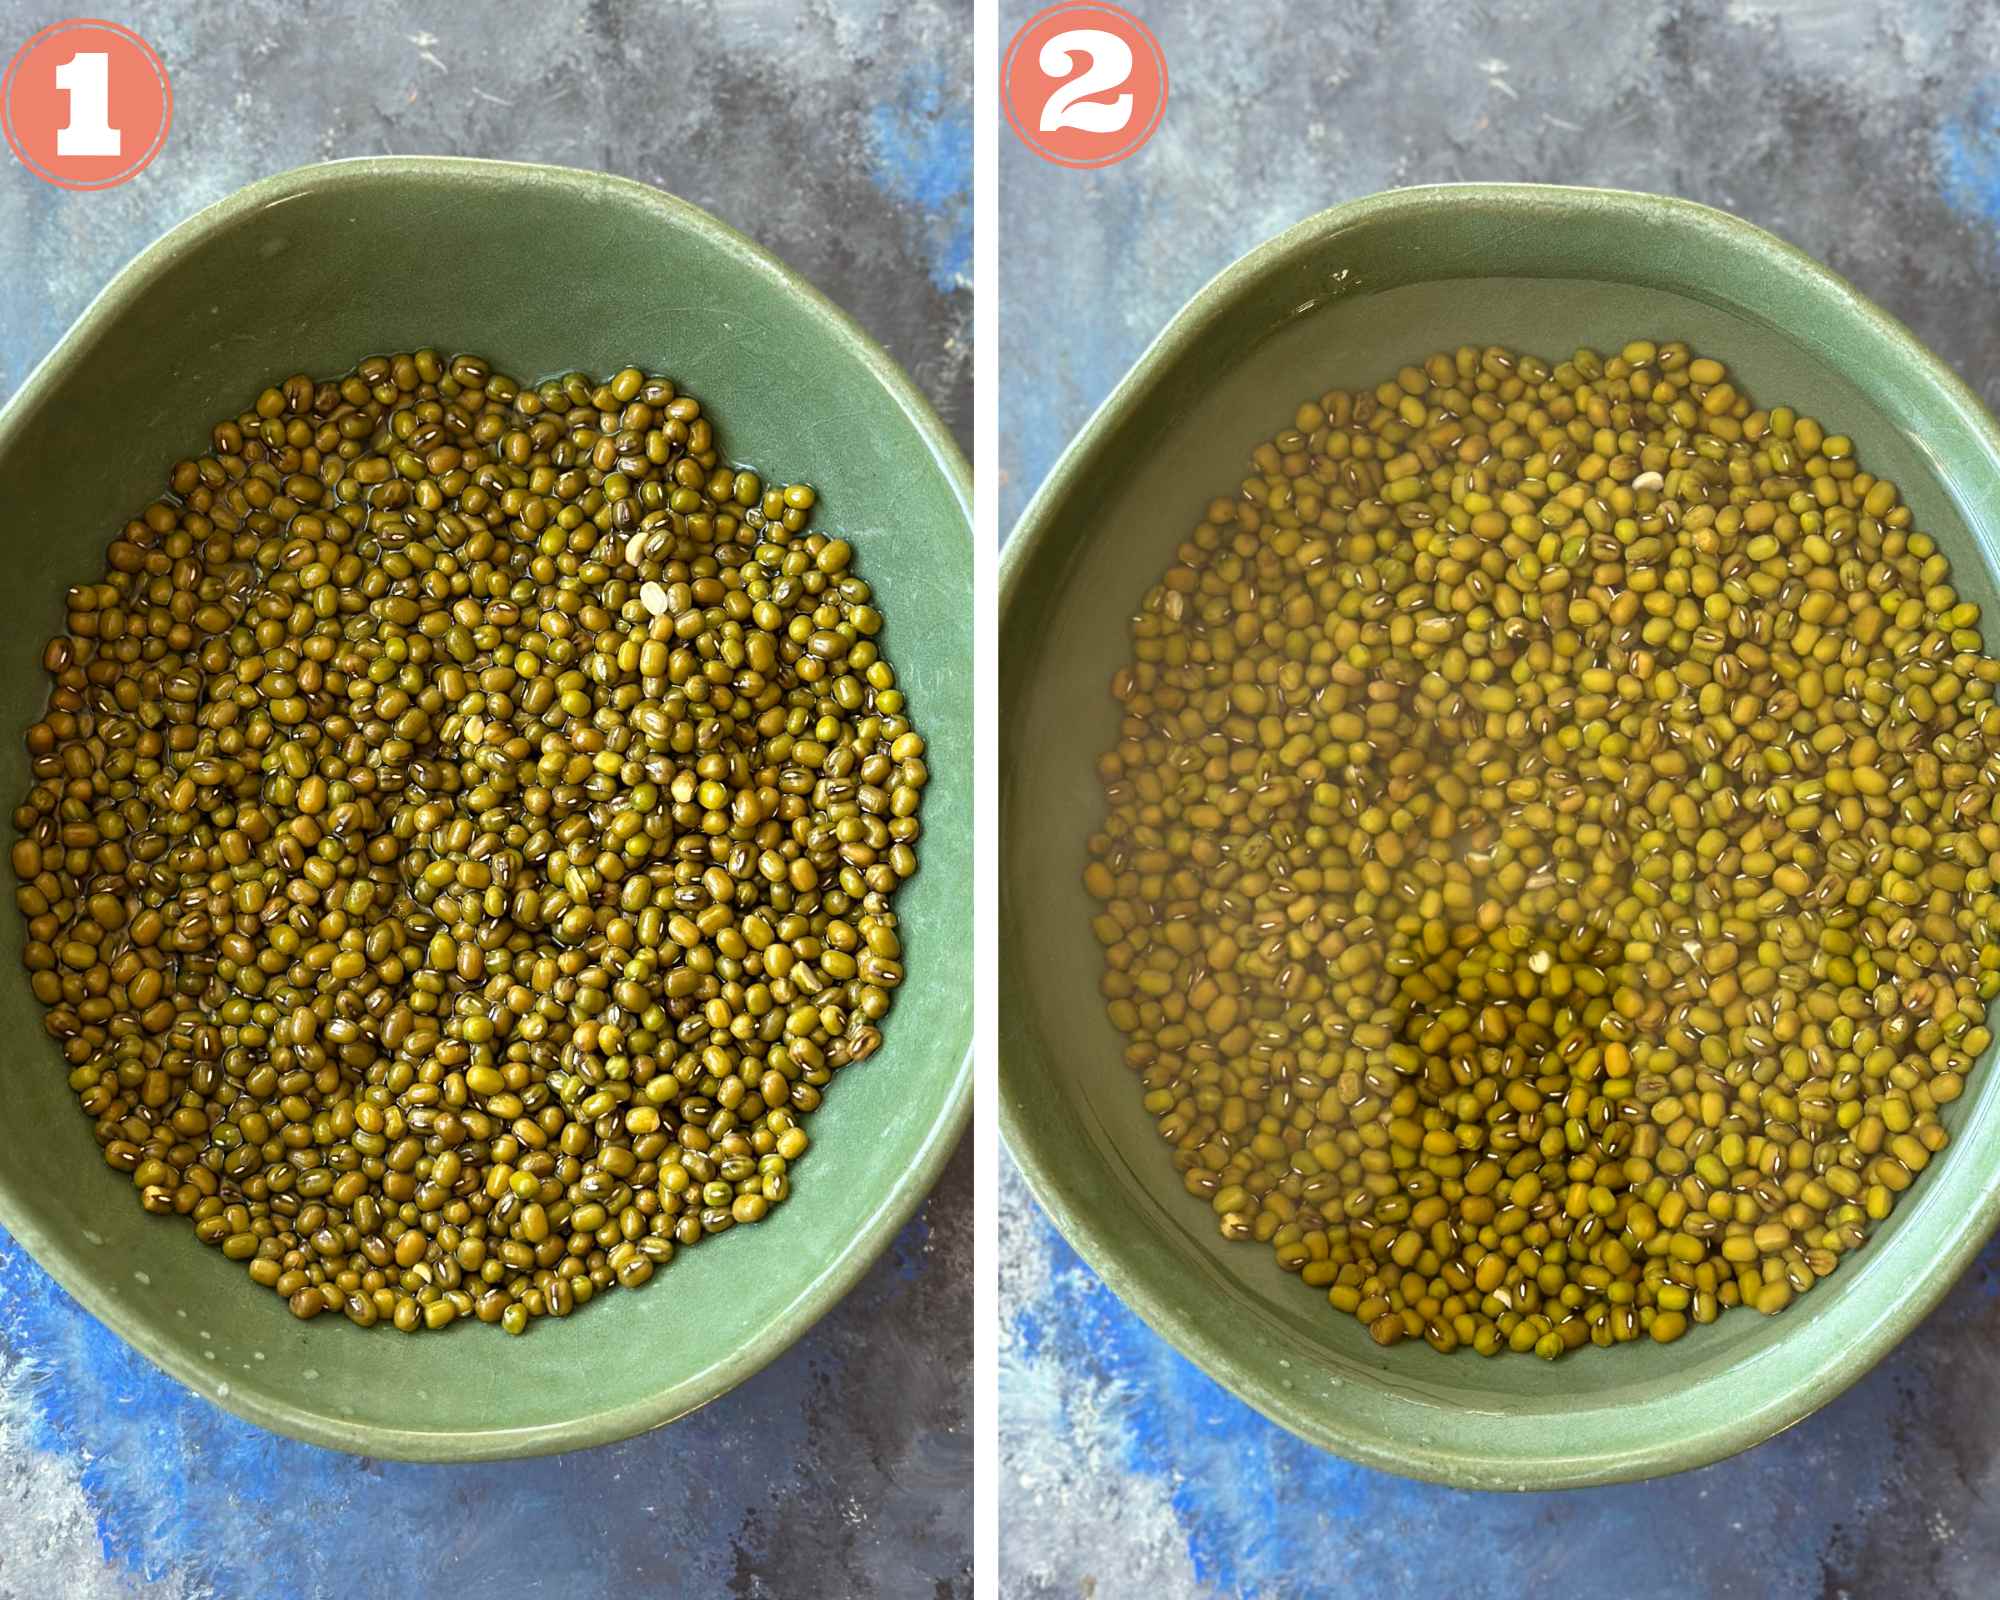
1- Wash the moong beans well and drain all the washing water.
2- Add warm water to it and rest covered for 8-10 hours.
3- After that time, the moong beans will be larger and softer. Drain the water and set aside.
4- Use a stainless steel container or an opaque vessel and place a piece of paper towel in it.

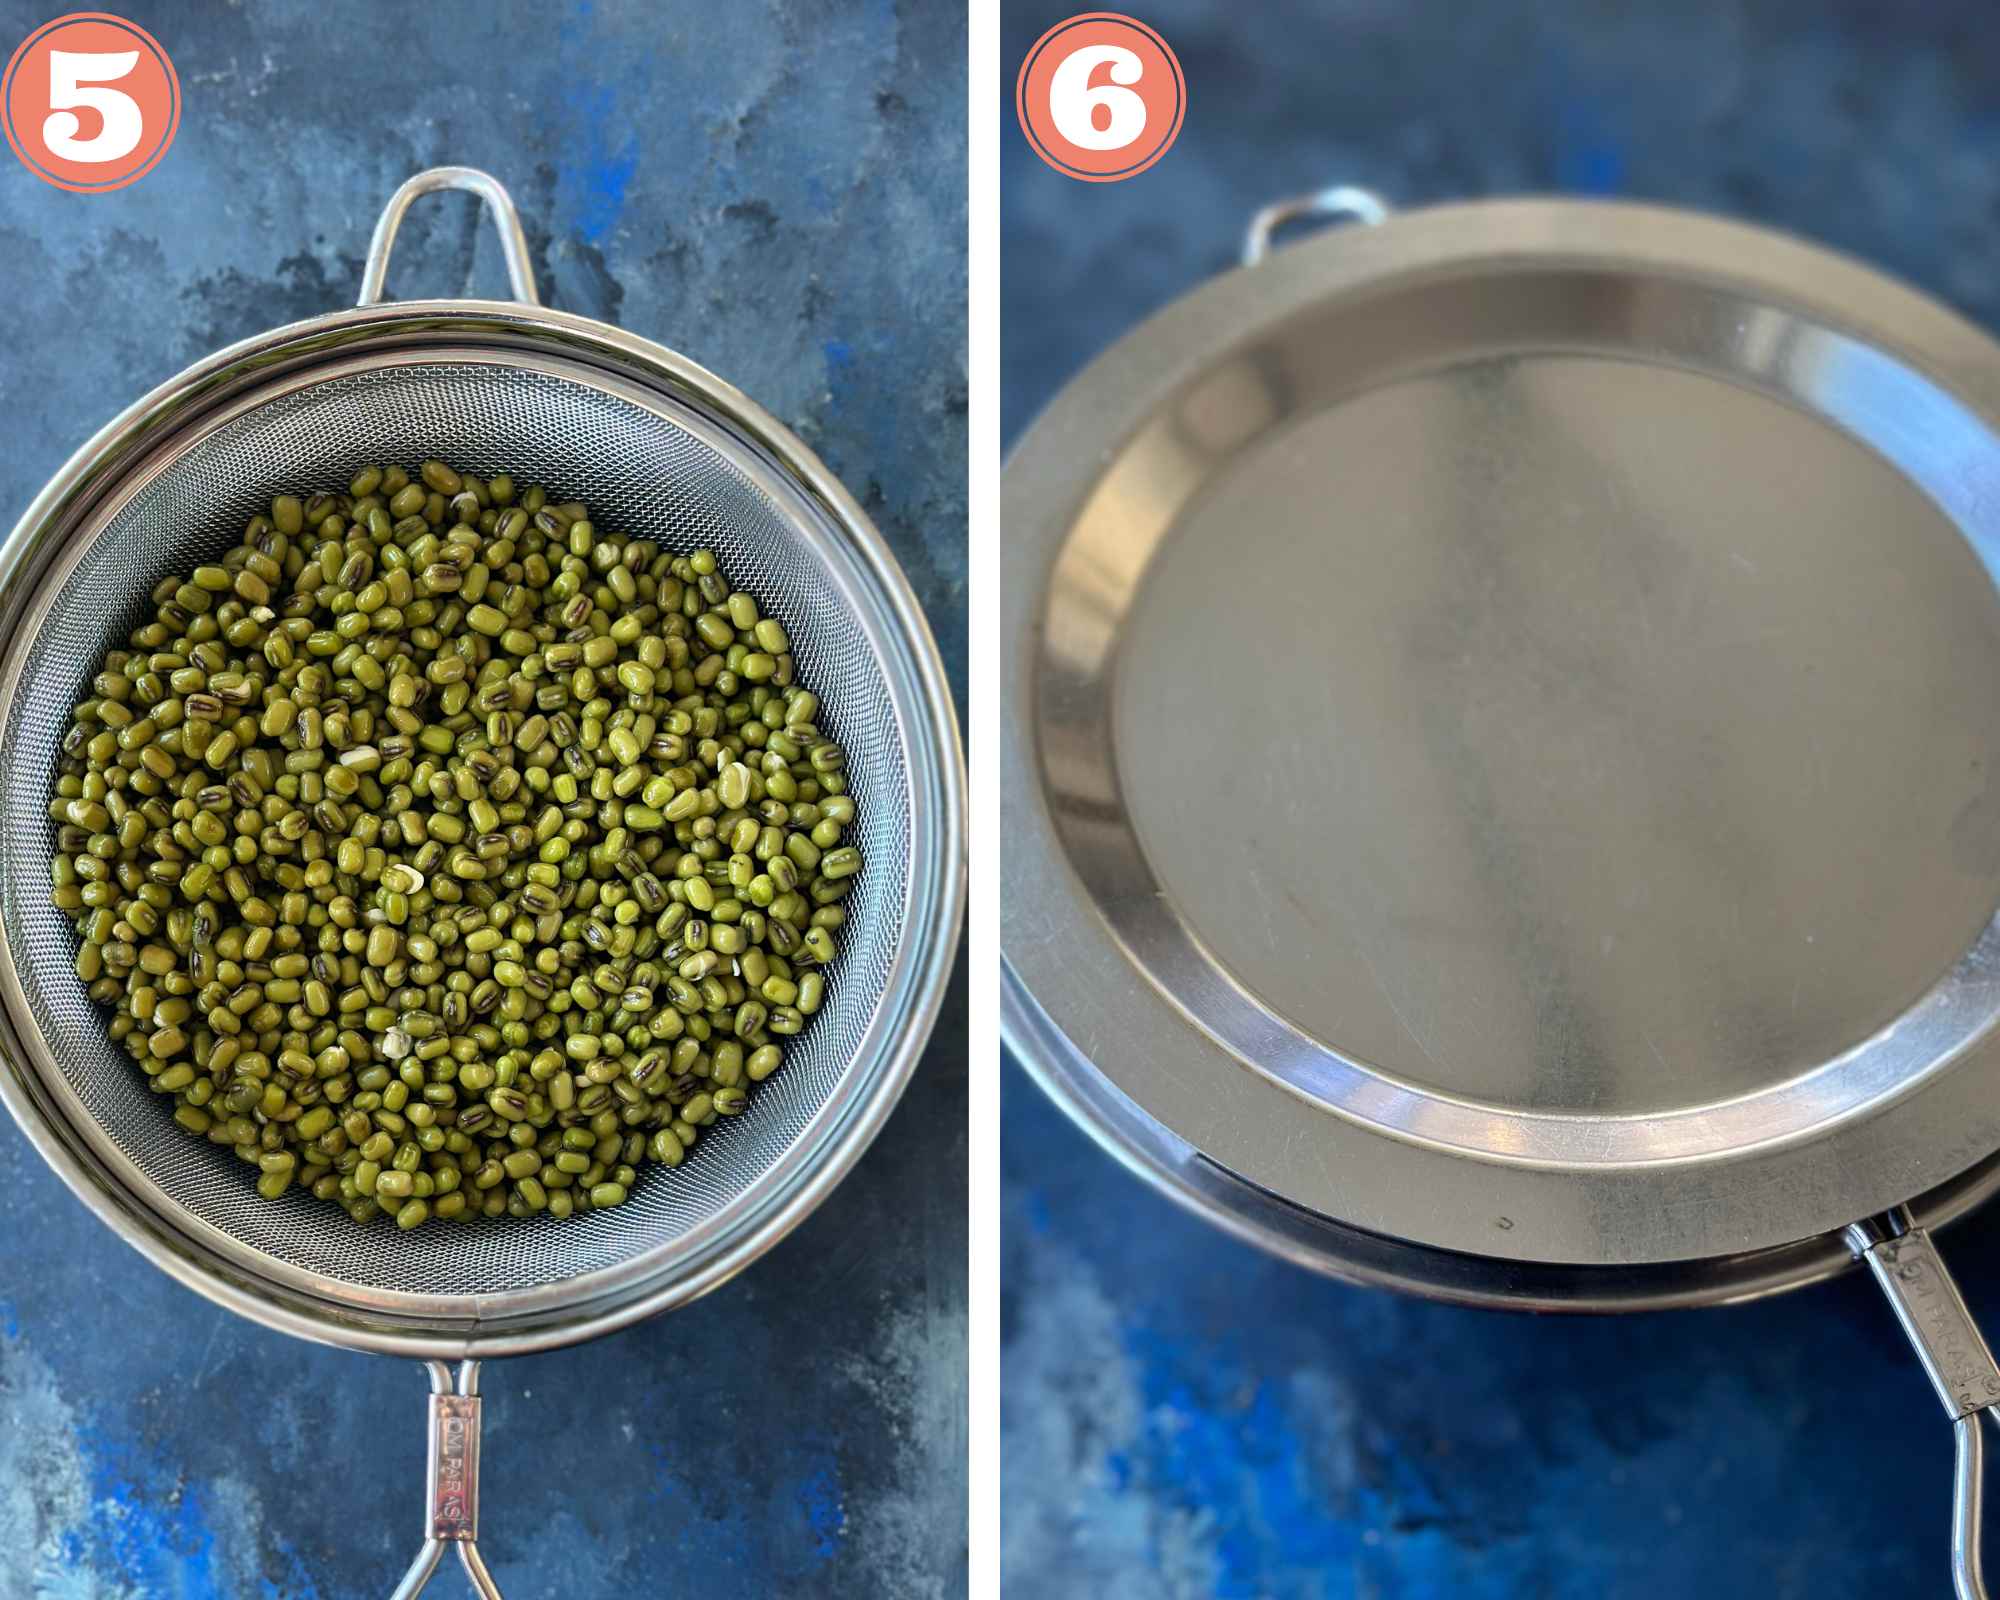
5- Transfer the moong beans to a colander or strainer and drain the remaining water.
6- Place it on the container and cover with a steel plate.
7- Keep the container in a dark warm place for 24 hours. Open, give it a mix and repeat.
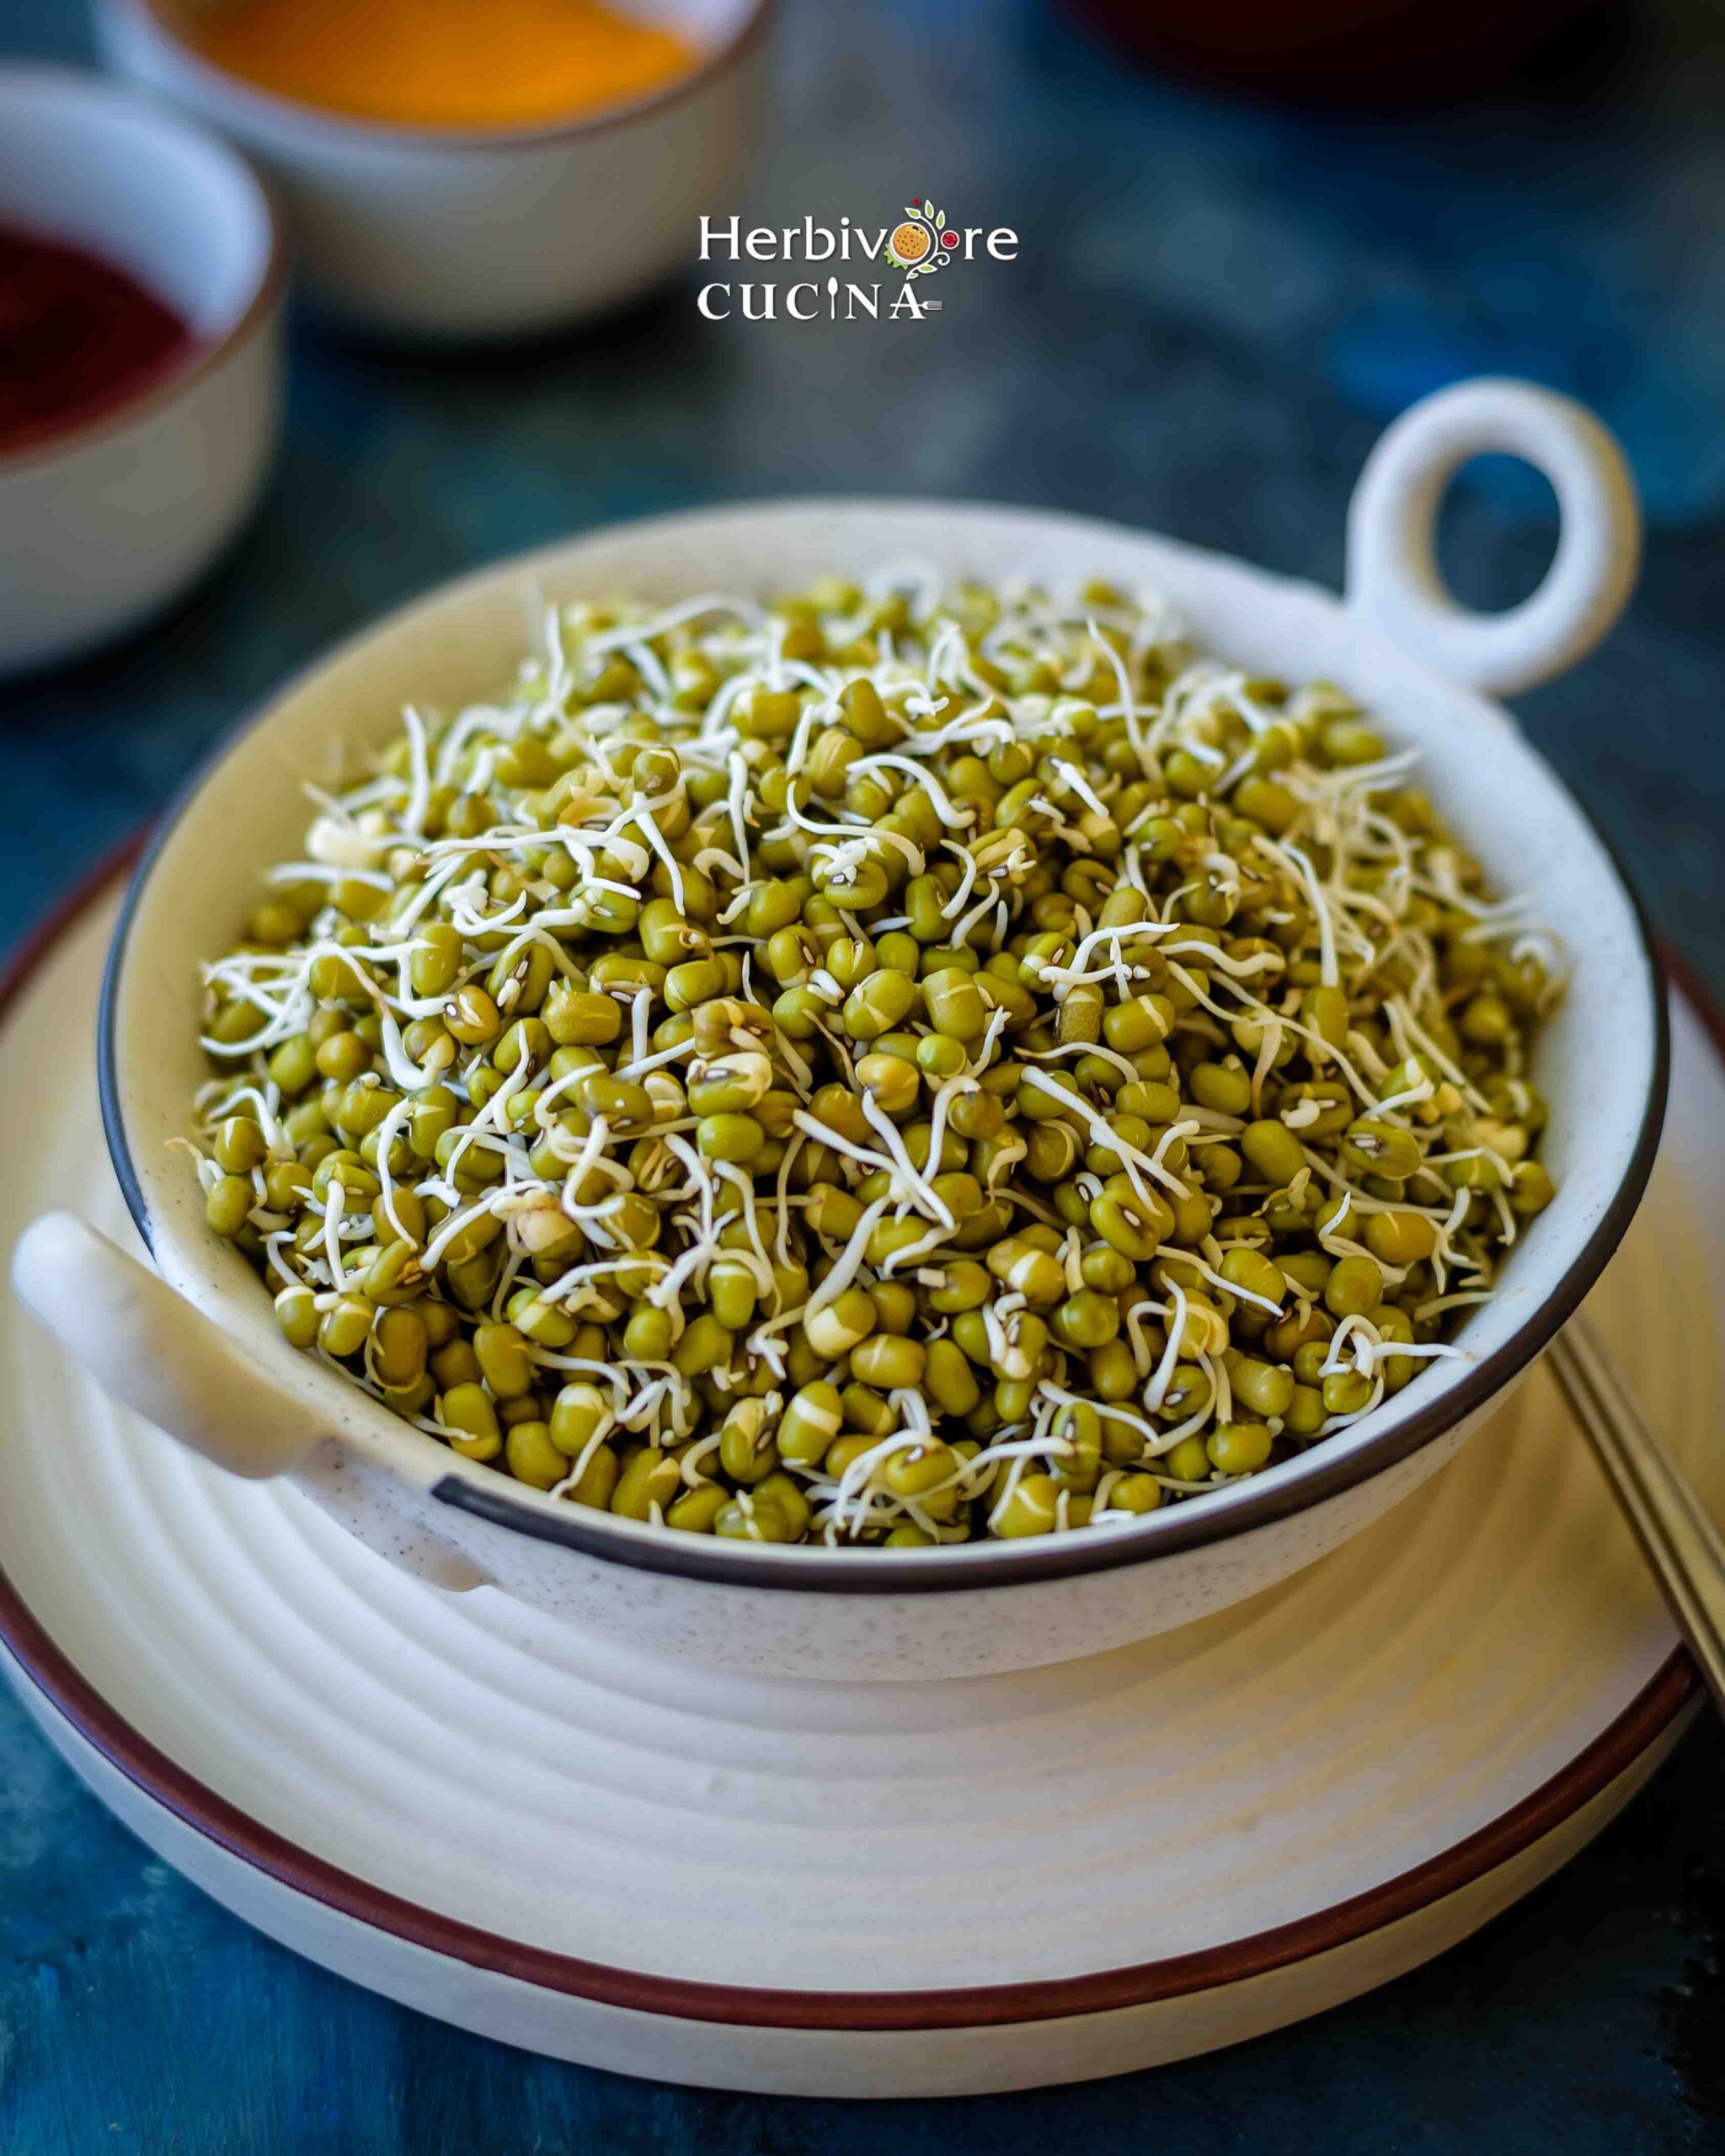
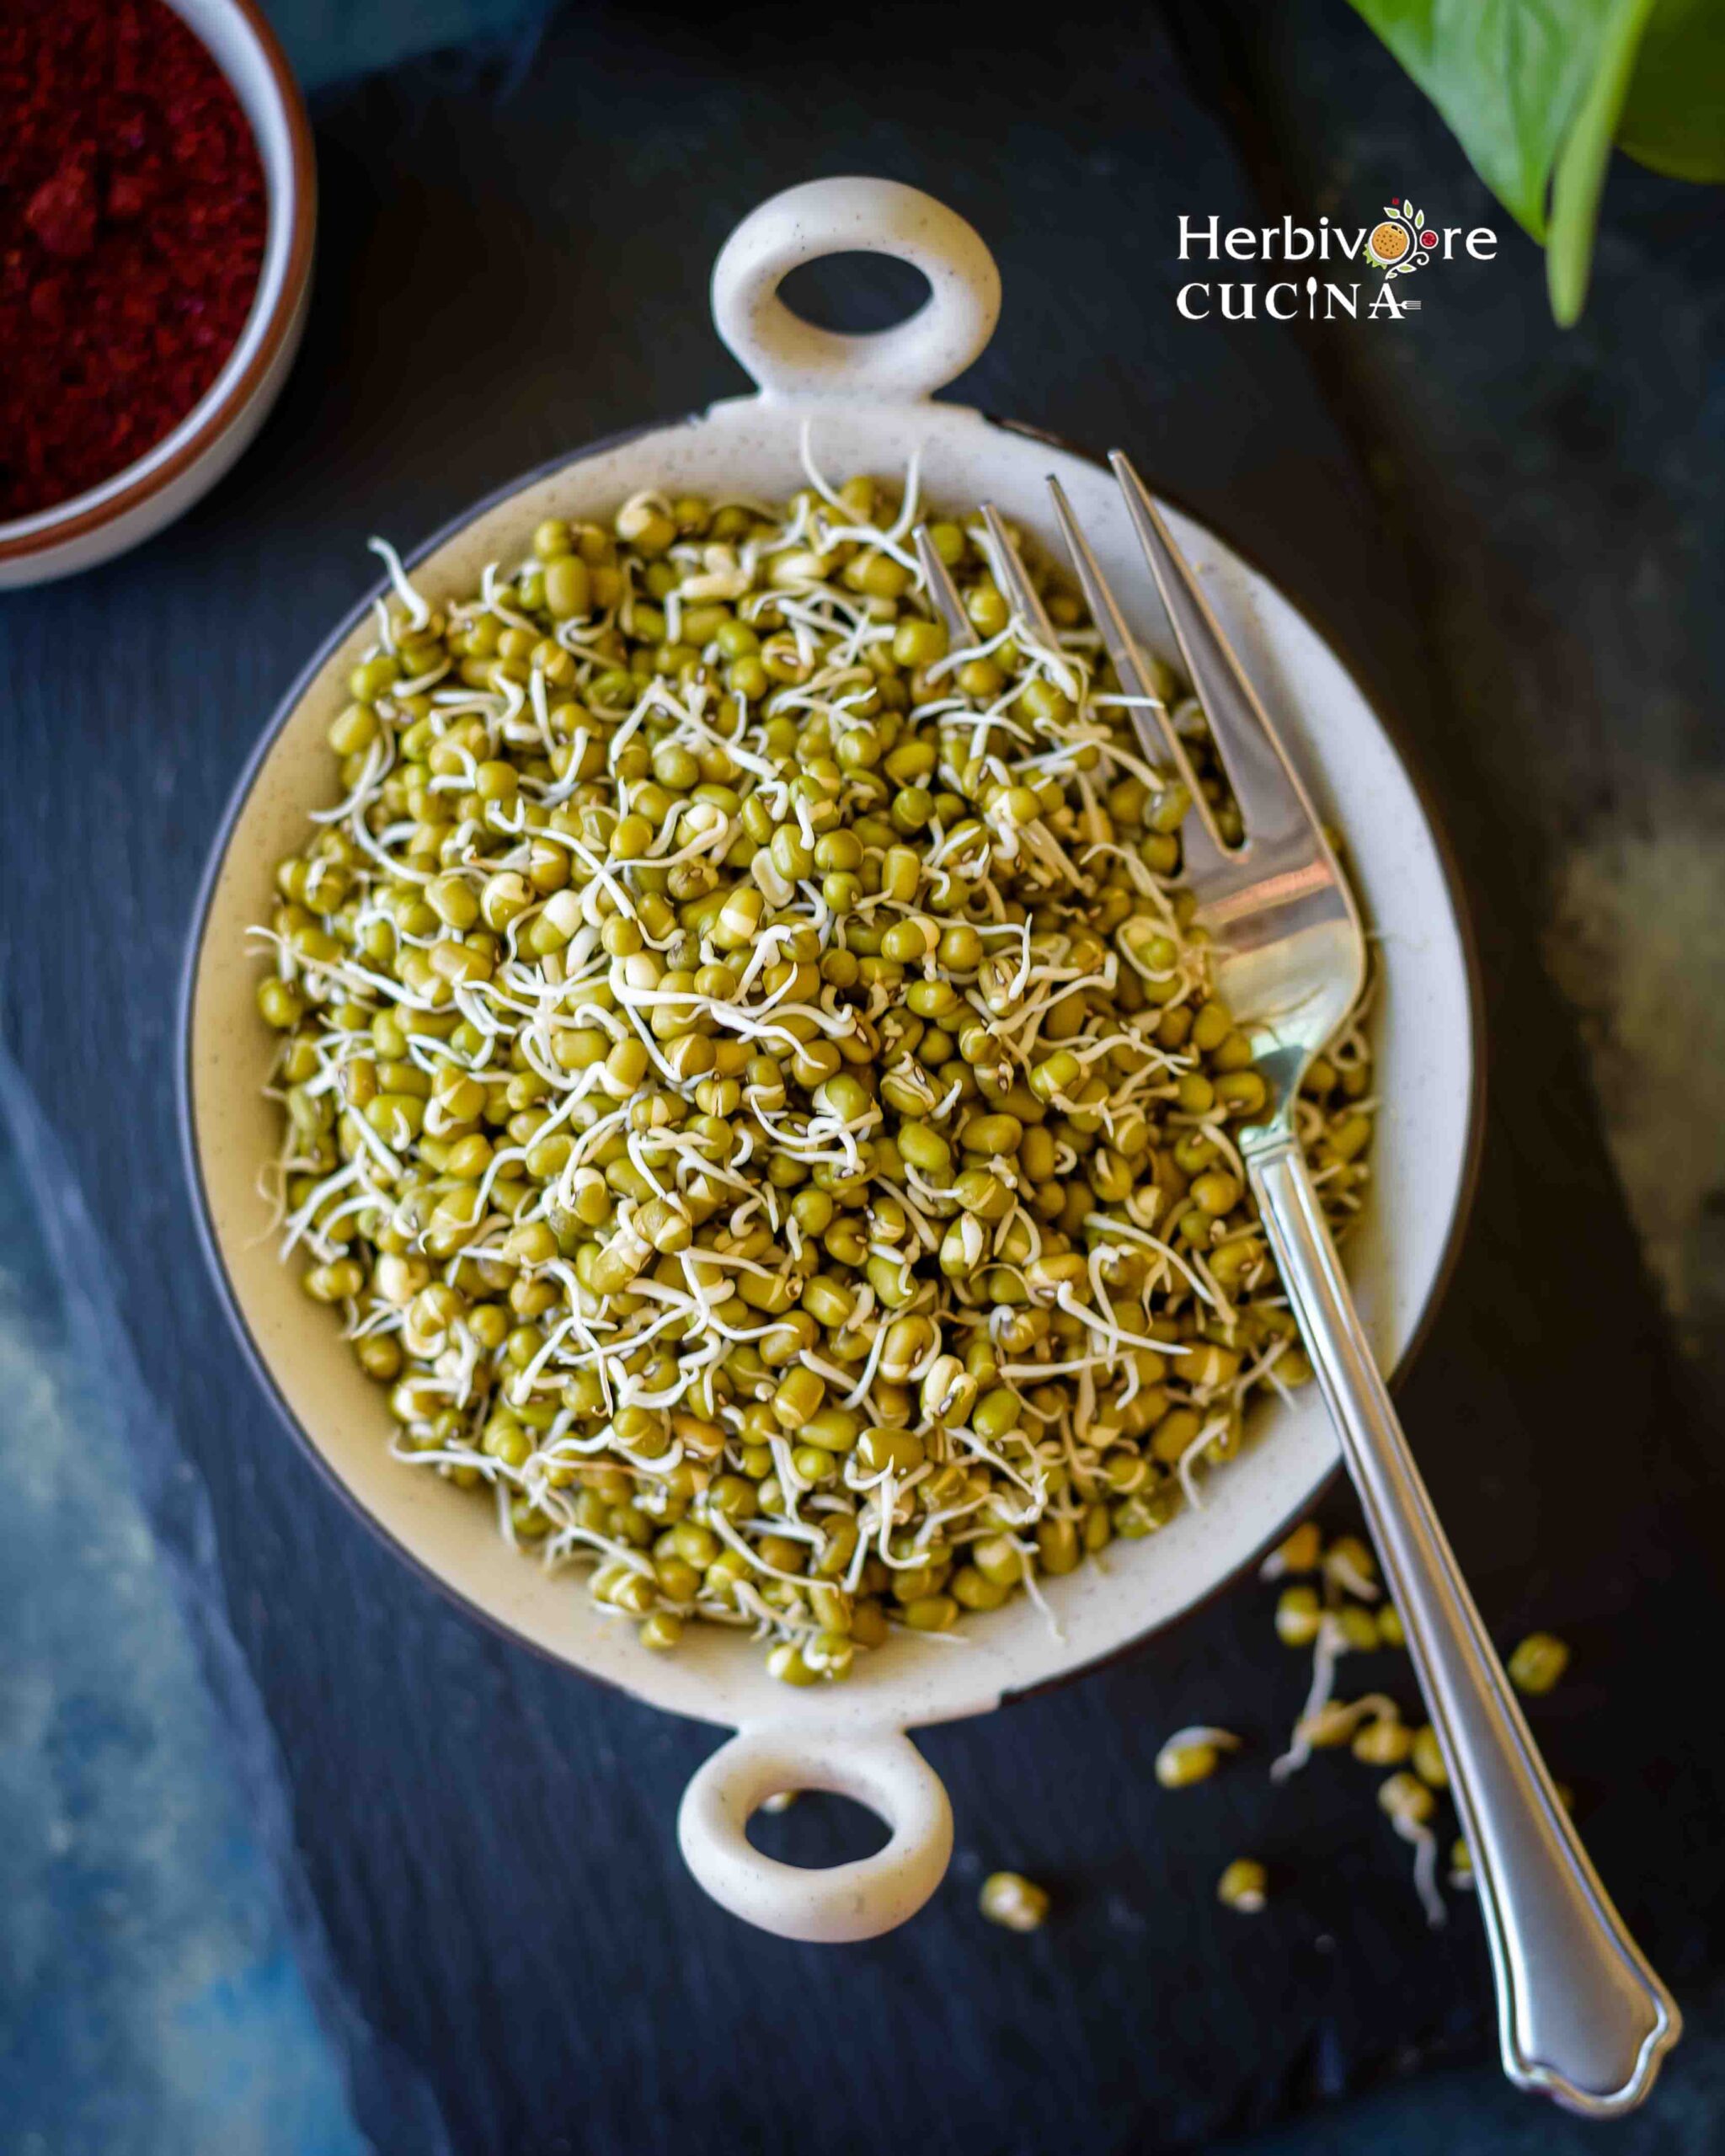
8- At the end of day 2 the moong beans will have long sprouts.

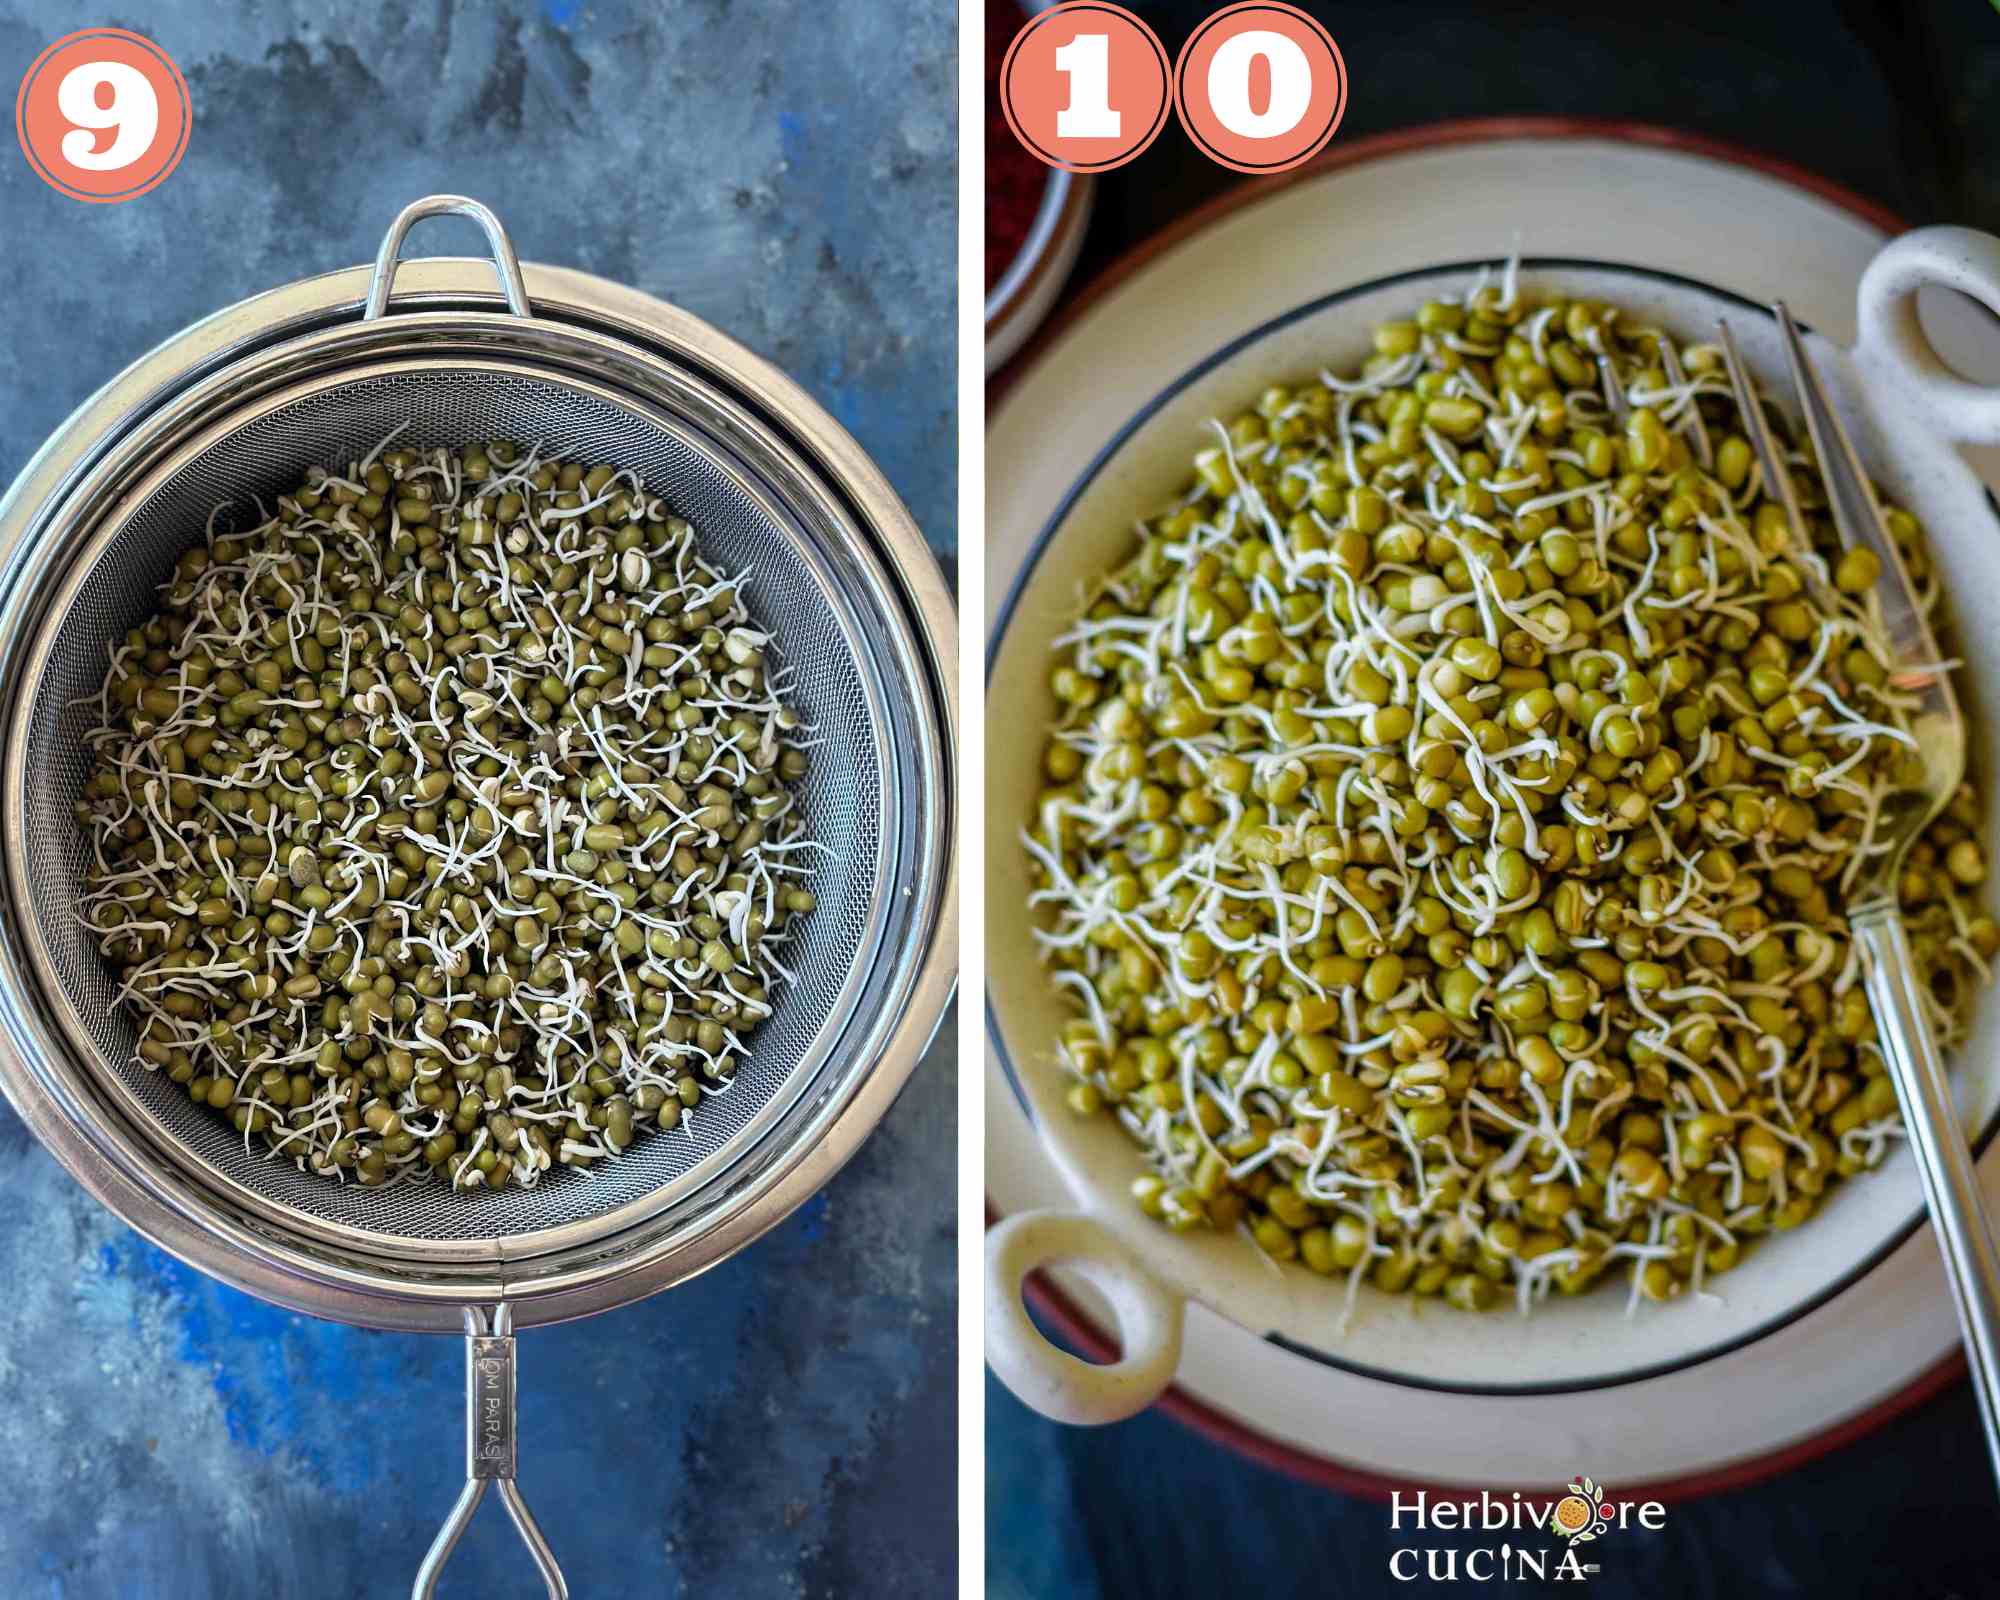
9- Then keep it for another 12 hours or so and check. If they look good, transfer to an airtight container.
10- Use the moong sprouts as desired or refrigerate till ready to use.
Expert Tips and Notes
- Sprouts are best to make in a dark warm place. The oven is a great place to sprout them. Do not keep the light on for this.
- Soak the moong beans in warm water to make them soft quicker. However, do not soak in boiling or hot water as they will boil in that water.
- Use an opaque container and cover. It keeps the light away from the sprouting process.
- Drain the water well before keeping the sprouts to grow. Having water in there will have fungus growing and the sprouts will smell funky.
- The prepared sprouts can be stored in the refrigerator for 3-4 days. Place a paper napkin in the container to absorb any excess moisture.
- These do not freeze well. It beats the purpose of making fresh sprouts at home. It does not defrost too well.
- It is easy to make sprouts with just ¼ cup moong beans or go all out and use 2-3 cups.
Using the Instant Pot
Sprouting moong beans using the instant pot is a great option too. Super simple recipe, with the only drawback being that the instant pot must be turned on for two days.
To make the sprouts, simply add the soaked and drained beans in a strainer. Add ½ cup water in the Instant Pot and set the strainer on a trivet. Set the mode to 'yogurt' and time to 24 hours. Close the lid and let the sprouts grow. After 24 hours, either repeat or use the sprouts.
Using an Insulated Thermos
Another popular way to make sprouts is to use a hot pack thermos. To use it, place the drained moong beans in a thermo and place a paper towel on it. Close the lid and place on the countertop for 24 hours. Open, turn the beans around and repeat for another day.
Recipe FAQs
Moong beans start to sprout within the first 12 hour. And the longest it can take is 36 hours. So moong sprouts take anywhere between 12 hours to 3 days to make.
While most things are believed to grow in light, bean sprouts grow well only in dark. When exposed to light, they turn black and bitter. This is often the reason why store bought sprouts are sometimes bitter. They are packed inclear packets and are exposed to light.
There is no definite time that says the moong sprouts are ready. We can use them when they are between 0.5 mm to a few centimeters. So based on how long you like your sprouts, you can determine when they are ready.
Moong beans when raw are super hard. To consume them raw in salads or other recipes, we need to sprout them.
Dated and old moong beans do not sprout well. Often, soaking them in warm water will make them work. However, if you see them turning dark, the water turning cloudy or having a foul smell, discard and use a fresh batch of moong. Moreover, organic moong beans are often seen to have better sprouting.
More Easy DIY Recipes


Love this recipe? Please leave a star rating in the recipe card below & if you REALLY like it, consider a review in the comments whilst you are there, thanks!
Perfect Moong Sprouts
Ingredients
- 1 cup moong beans
- 2 cups water
Instructions
- Wash the moong beans well and drain all the washing water.1 cup moong beans
- Add warm water to it and rest covered for 8-10 hours.2 cups water
- After that time, the moong beans will be larger and softer. Drain the water and set aside.
- Use a stainless steel container or anything opaque and place a piece of paper towel in it.
- Transfer the moong beans to a colander or strainer and drain the remaining water.
- Place it on the container and cover with a steel plate.
- Keep the container in a dark warm place for 24 hours. Open, give it a mix and repeat.
- At the end of day 2 the moong beans will have long sprouts.
- Then keep it for another 12 hours or so and check. If they look good, transfer to an airtight container.
- Use the moong sprouts as desired or refrigerate till ready to use.
Notes
-
- Sprouts are best to make in a dark warm place. The oven is a great place to sprout them. Do not keep the light on for this.
- Soak the moong beans in warm water to make them soft quicker. However, do not soak in boiling or hot water as they will boil in that water.
- Use an opaque container and cover. It keeps the light away from the sprouting process.
- Drain the water well before keeping the sprouts to grow. Having water in there will have fungus growing and the sprouts will smell funky.
- The prepared sprouts can be stored in the refrigerator for 3-4 days. Place a paper napkin in the container to absorb any excess moisture.
- These do not freeze well. It beats the purpose of making fresh sprouts at home. It does not defrost too well.
- It is easy to make sprouts with just ¼ cup moong beans or go all out and use 2-3 cups.


Leave a Reply