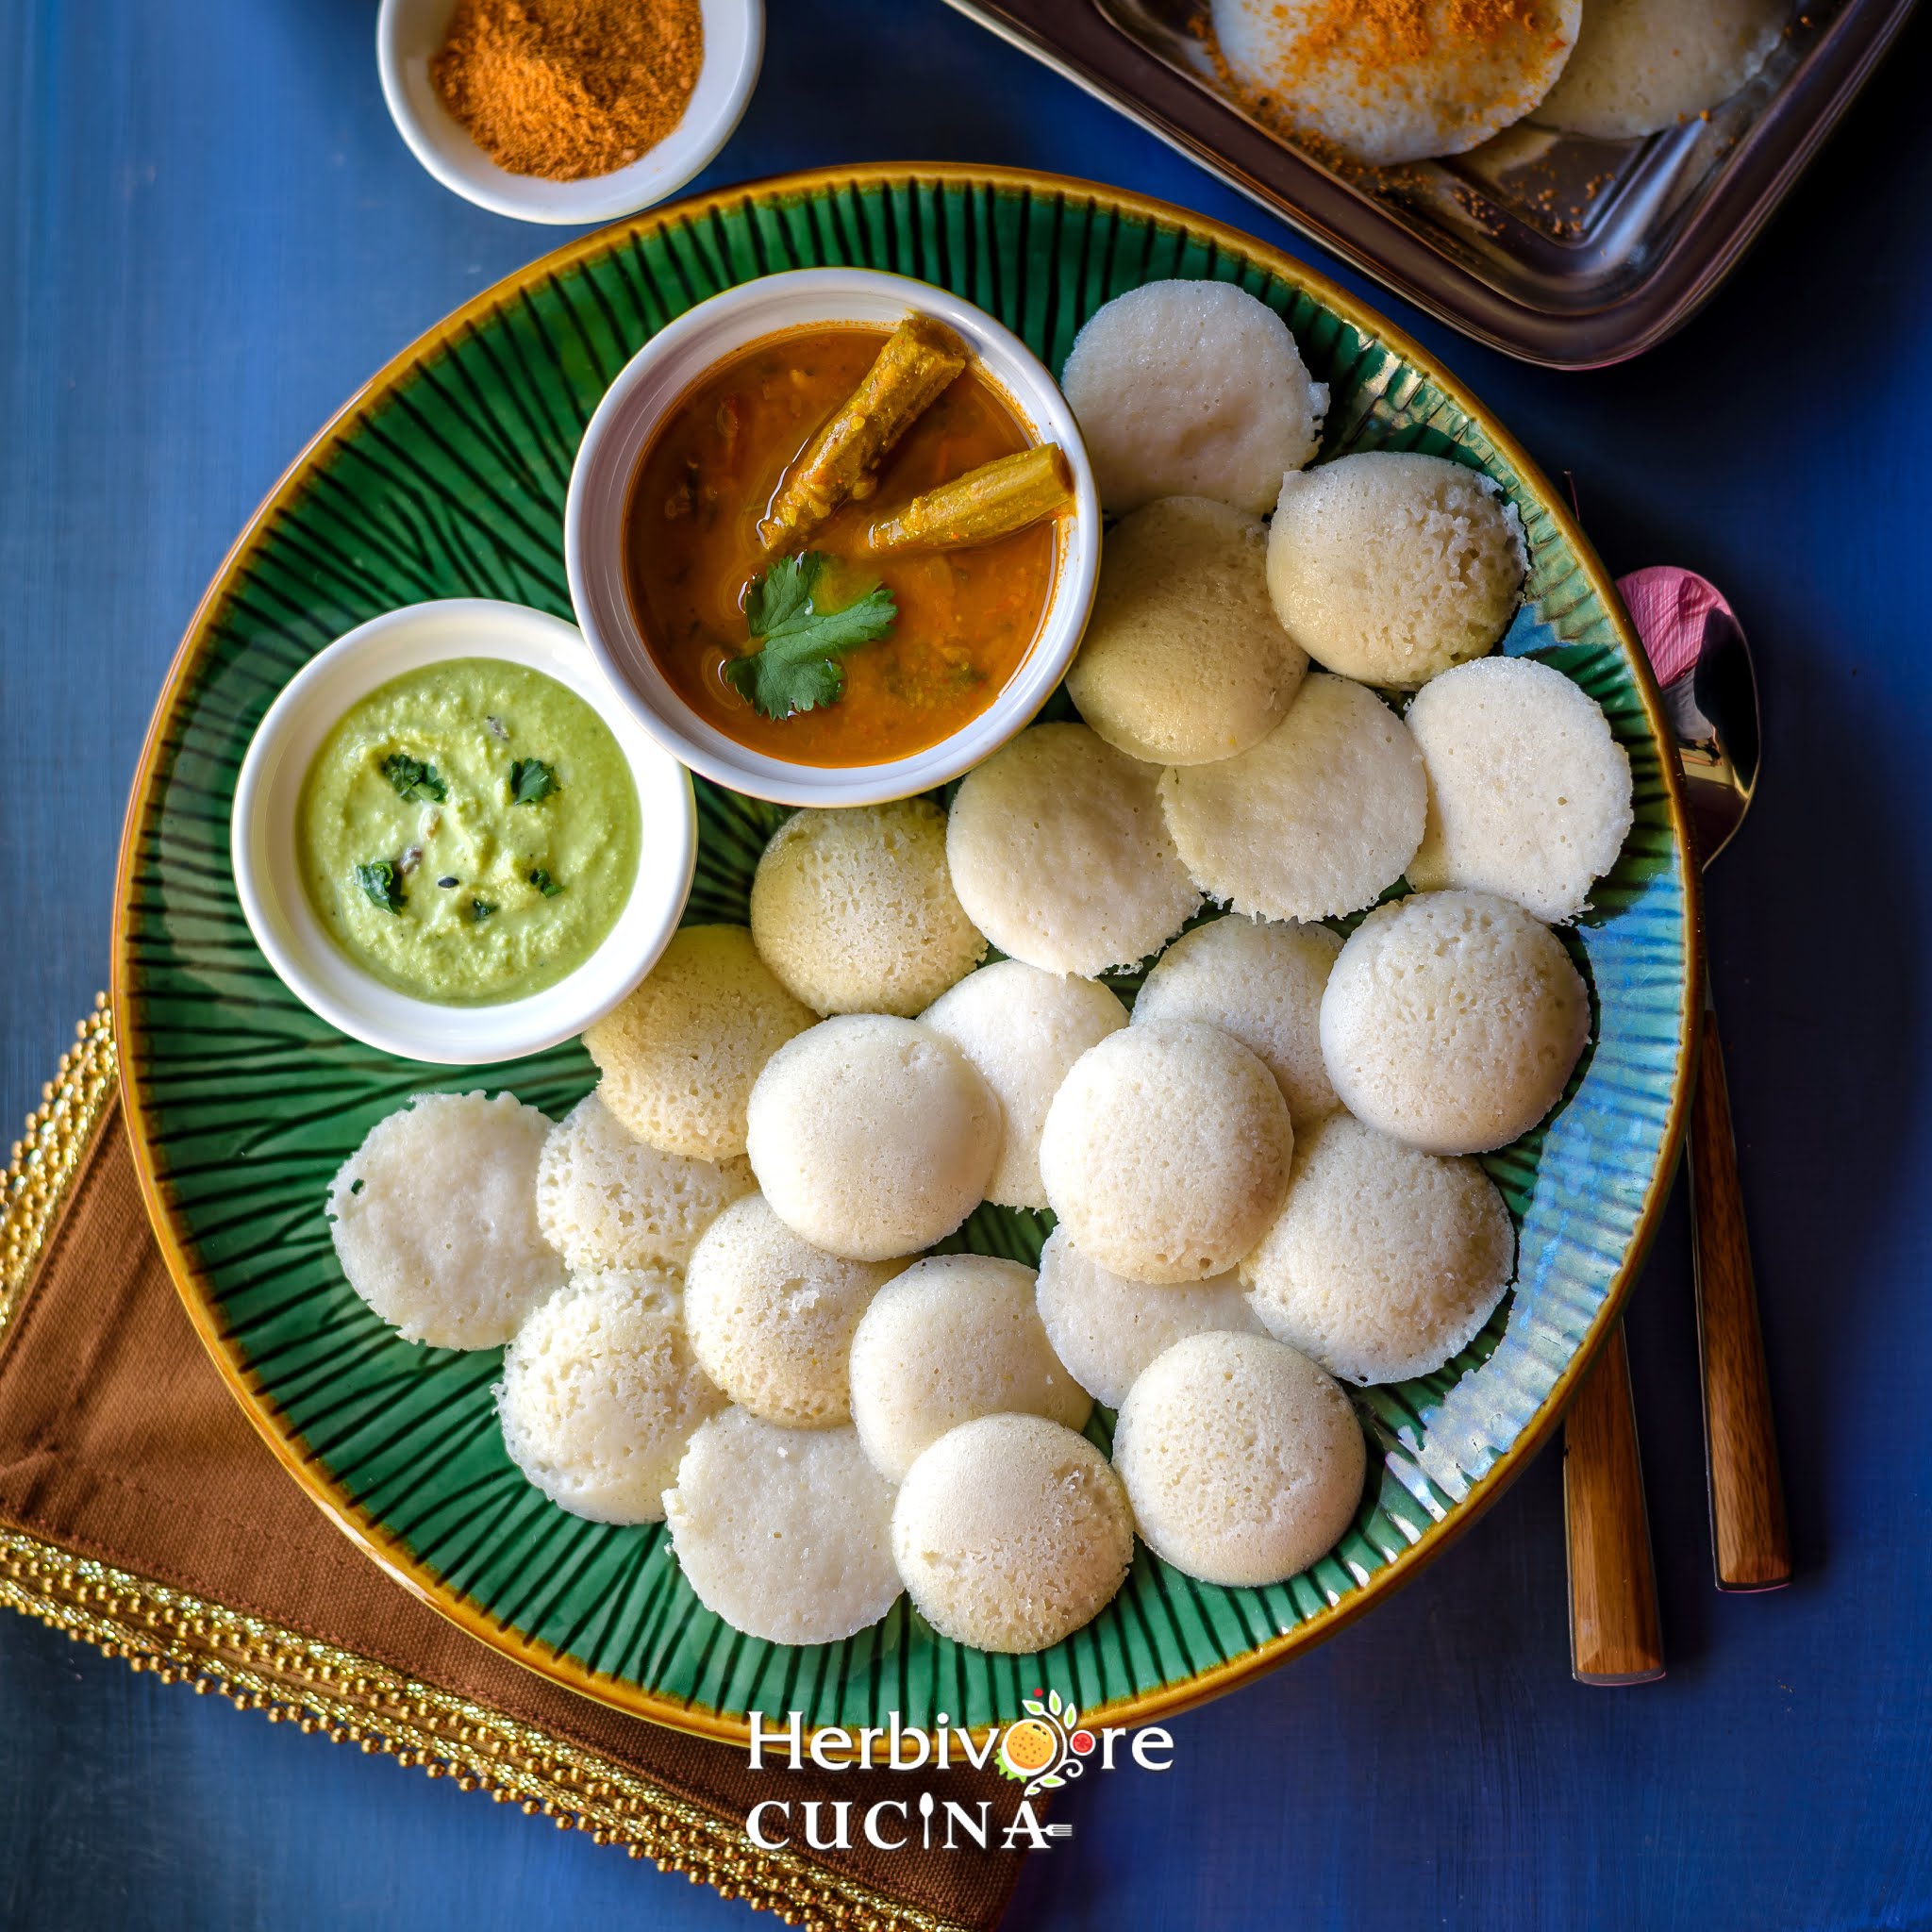
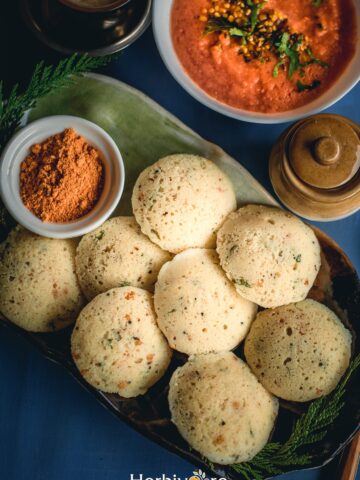
A delicious recipe from South India, Idli is perfect to enjoy for breakfast or a meal. This Instant Pot Idli recipe guides to make the batter from scratch and steam the idlis in the instant pot.
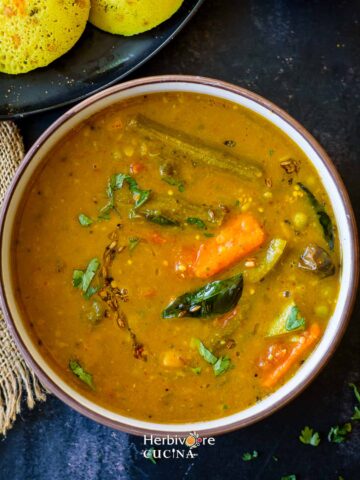
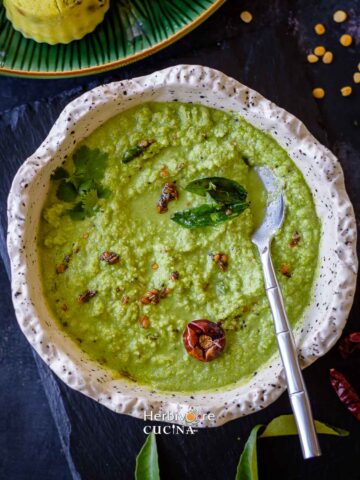
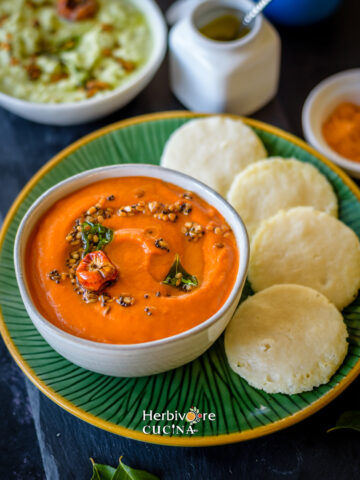
It pairs perfectly with sambar, chutney or rasam.
Weeknights call for delicious meals that are easy to put together. And some of these double up as a perfect breakfast or brunch recipe too.
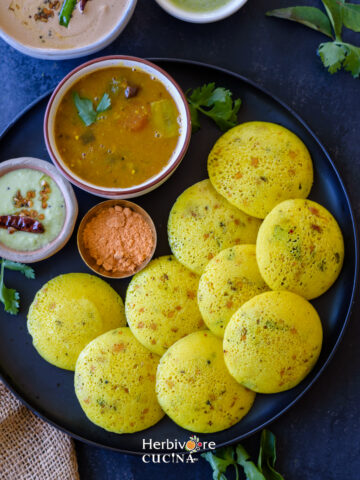
South Indian cuisine falls into this category. These include dosa, uttapam, sevai, appe and idli. Most of these use a batter or mix that is made using dal and rice. These recipes pair so well with Cilantro Coconut Chutney, Red Tomato Chutney, Red Pepper Chutney, Sambar and Sukha Coconut Chutney.
We totally love the cuisine and all the dishes that come in it. Idli is especially loved in most households like ours as it is perfect for kids and adults alike. And when it comes to making idli at home; there are a few tips and tricks we need to keep in mind when making it. After making it umpteen number of times, I have listed out some points to always make it perfect!
Jump to:
What is Idli
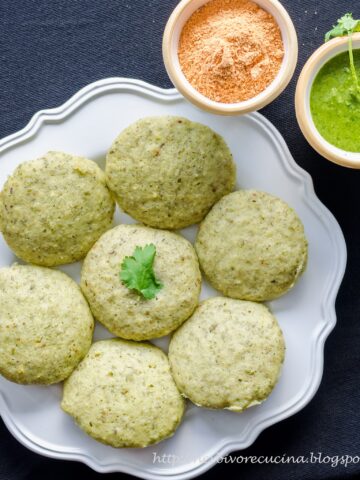
Idli is a steamed savory cake make with a fermented batter of rice and dal. These soft, round rice cakes are great to enjoy as a snack, meal or breakfast.
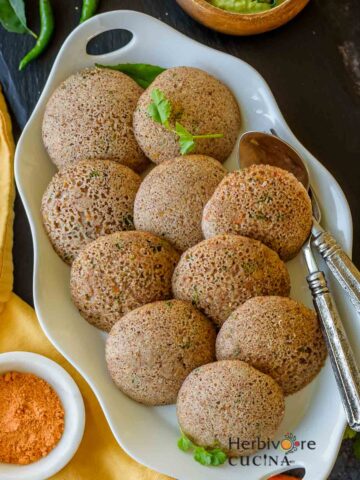
While the traditional recipe needs urad dal and short grain idli rice, there are various ways to make idli now. From Ragi Idli and Rava Idli to Green Dal Idli, Quinoa Idli and Sambar stuffed Idlis; we love them all and make these on rotation for meals.
The process of making idlis is easy but time consuming. While we only need a few minutes of active time at each stage, the time required to make these spans over a couple of days.
First, we soak the lentil and rice till soft. Then we grind it to a batter. Next, we let the batter ferment and finally make pillowy soft idlis using the batter.
Why this recipe works
- The recipe is naturally Vegan.
- We can make the batter ahead of time and use it to make idli later.
- It is also gluten-free.
- This is an easy to follow timed recipe.
- Idli is perfect as a breakfast or meal.
- This is great as a lunch-box option as well.
- We can make the batter as well as steam the idlis in the instant pot.
- With only a few pointers we can make idlis without adding any artificial rising agents.
- Not just by itself, the idlis work well to make other recipes like masala idli, idli upma, idli chili dry, ghee podi idli etc.
Pro Tip: The top portion of the batter is best for idli and the bottom layer can be used to make dosa.
Using the Instant Pot
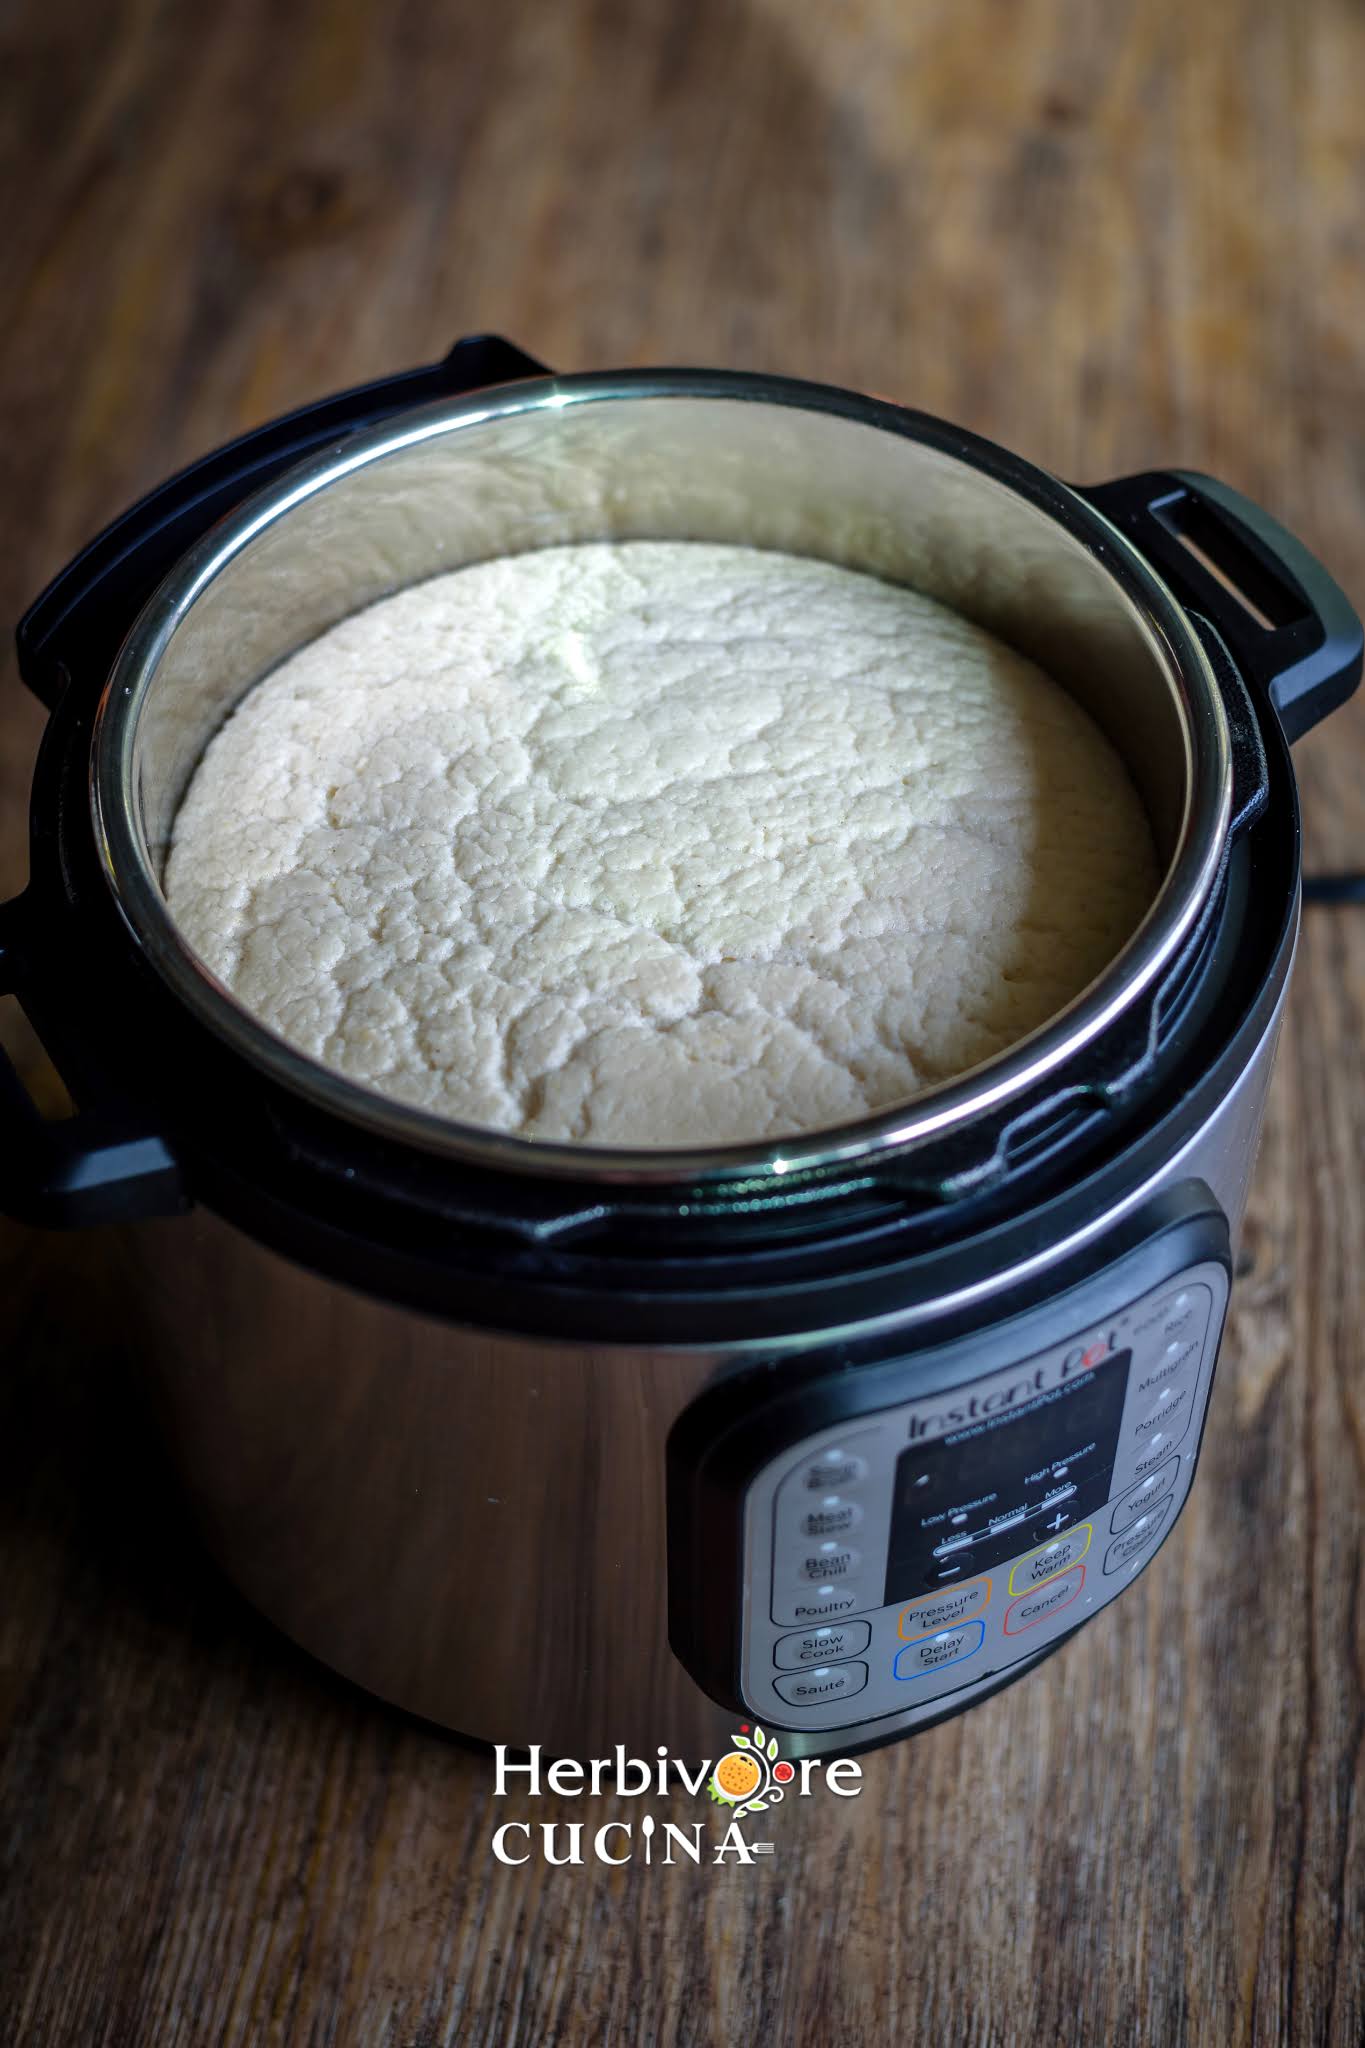
The fermentation of idli or dosa batter needs a constant warm temperature throughout the process. During winters the change in temperature during day and night is not the perfect condition to ferment the batter.
Using the Instant Pot is a great idea. This comes with a 'yogurt mode' that essentially works really well to ferment batters as well. With an insulated case, the temperature is maintained for the time we need, giving great results irrespective of outside temperature.
It is really simple; but beware; do not ferment the batter on high setting. This mode comes with a boil function and that will be too warm for the batter. At that setting the batter will start cooking instead of fermenting!
Plus, I have mentioned adding a couple of ice cubes in the batter to maintain a slightly cooler temperature. It works really well to avoid cooking the batter in the pot itself.
Ingredients and Substitutions
- Urad Dal: For making idli we use urad dal. This comes from black gram or matpe beans. The hulled off white dal from the gram is urad. It can be whole (urad gota) or split (urad dal). Bothe these work well for the recipe.
- Idli Rice: Short grain rice that is signature to Southern India is perfect to make idli. However, any short grain rice like sona masoori works well too. Simply make sure the rice does not have any foreign particles or husk. Discard these before using.
- Fenugreek seeds: A pinch of fenugreek seeds helps kick off the fermentation process and adds health benefits to idli. Try not to skip these. Moreover, methi seed powder works in the recipe too.
- Poha: Some flattened rice or poha is great to add to the recipe. They help us make fluffy idlis. However, skip if this is not available. Soak the thick poha for 30 minutes before grinding and use thin poha directly in the recipe.
- Salt: Salt is required for flavor and taste. If adding salt before fermentation, use Himalayan salt or sea salt. Iodized salt, table salt or processed salts inhibit the fermentation process. These are perfect to add after the batter has fermented.
- Other than these, we only need some oil to grease the idli stand before steaming the idlis. And some water to wash, soak, grind and make the idlis.
See the recipe card for detailed ingredient information, measurements and nutrition.
How to make this recipe
To make the idli batter
1- Add the urad dal in a large bowl. Rinse with tap water a couple of times (till the water runs clear) and soak in enough water to cover them completely and remain a couple of inches above it. Add in fenugreek seeds as well.
2- Do the same with idli rice. Soak them in a separate container and set aside for 8-10 hours.
3- If using thick poha, soak them in water 30 minutes before you are ready to grind the batter.
4- In a high speed blender add drained urad dal and fenugreek seeds.
5- Add only a little of the soaking water and grind till it is smooth.
6- Transfer to the insert of the instant pot.
7- In the same blender jar (without washing) add the drained rice and poha.
8- Grind till smooth and transfer to the ground dal.
9- Add salt (if using) and mix everything well. Also add in 2-3 cubes of ice.
10- Place the insert in the instant pot and set the mode to yogurt and normal. Adjust the time to 10 hours and cover with a glass cover. Let this stand for 10 hours.
11- After the time has passed, check of the batter has fermented. If not, let it ferment for another 1 hour.
12- Open the lid and transfer to a bowl.
Pro Tip: The top portion of the batter is best for idlis and the bottom layer can be used to make dosa.
To make the idlis
1- Add water in the instant pot insert and set it to 'saute'. Let the water come to a boil.
2- Meanwhile, grease the idli stand with oil or non-stick spray.
3- Spoon in some batter in each of the cavities.
4- Place the idli stand in the instant pot. Set the mode of the Instant Pot to Steam and vent to venting. The time required to steam the idlis is 10 minutes.
Pro Tip: The instant pot timer does not work with the steam mode. Keep the time using an external timer.
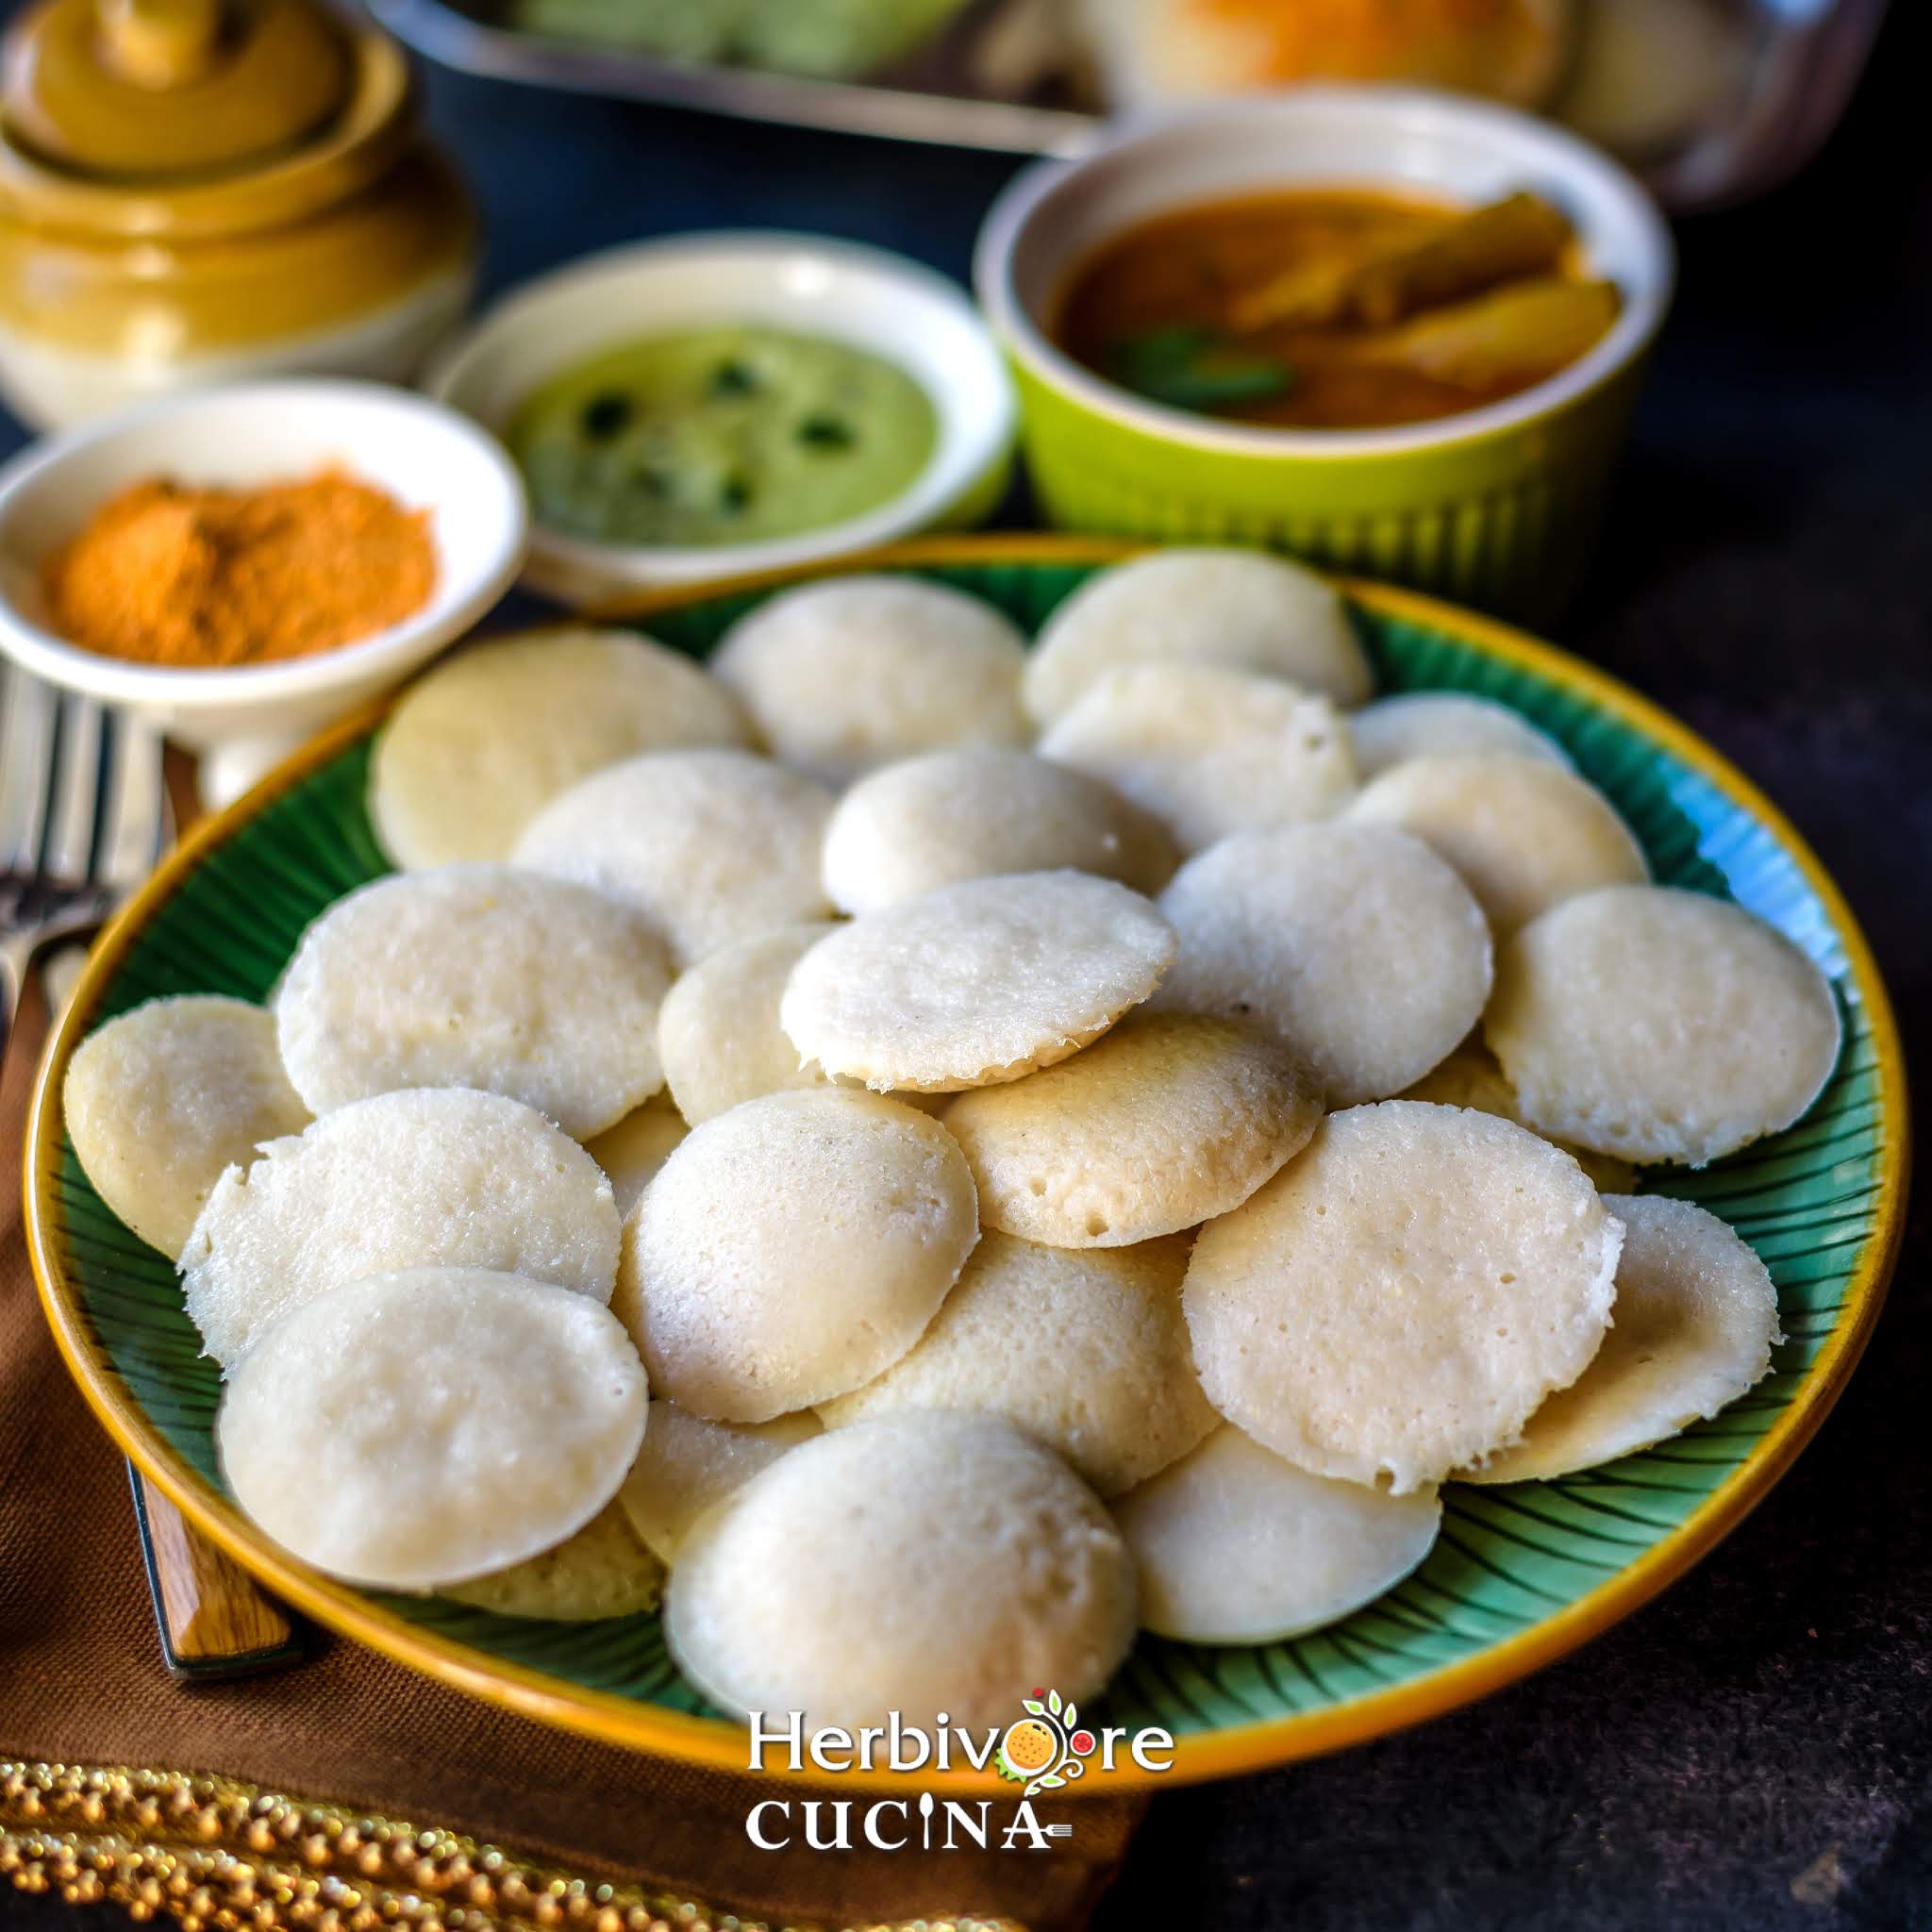
5- After the idlis have steamed, remove the stand and transfer the idlis to a plate.
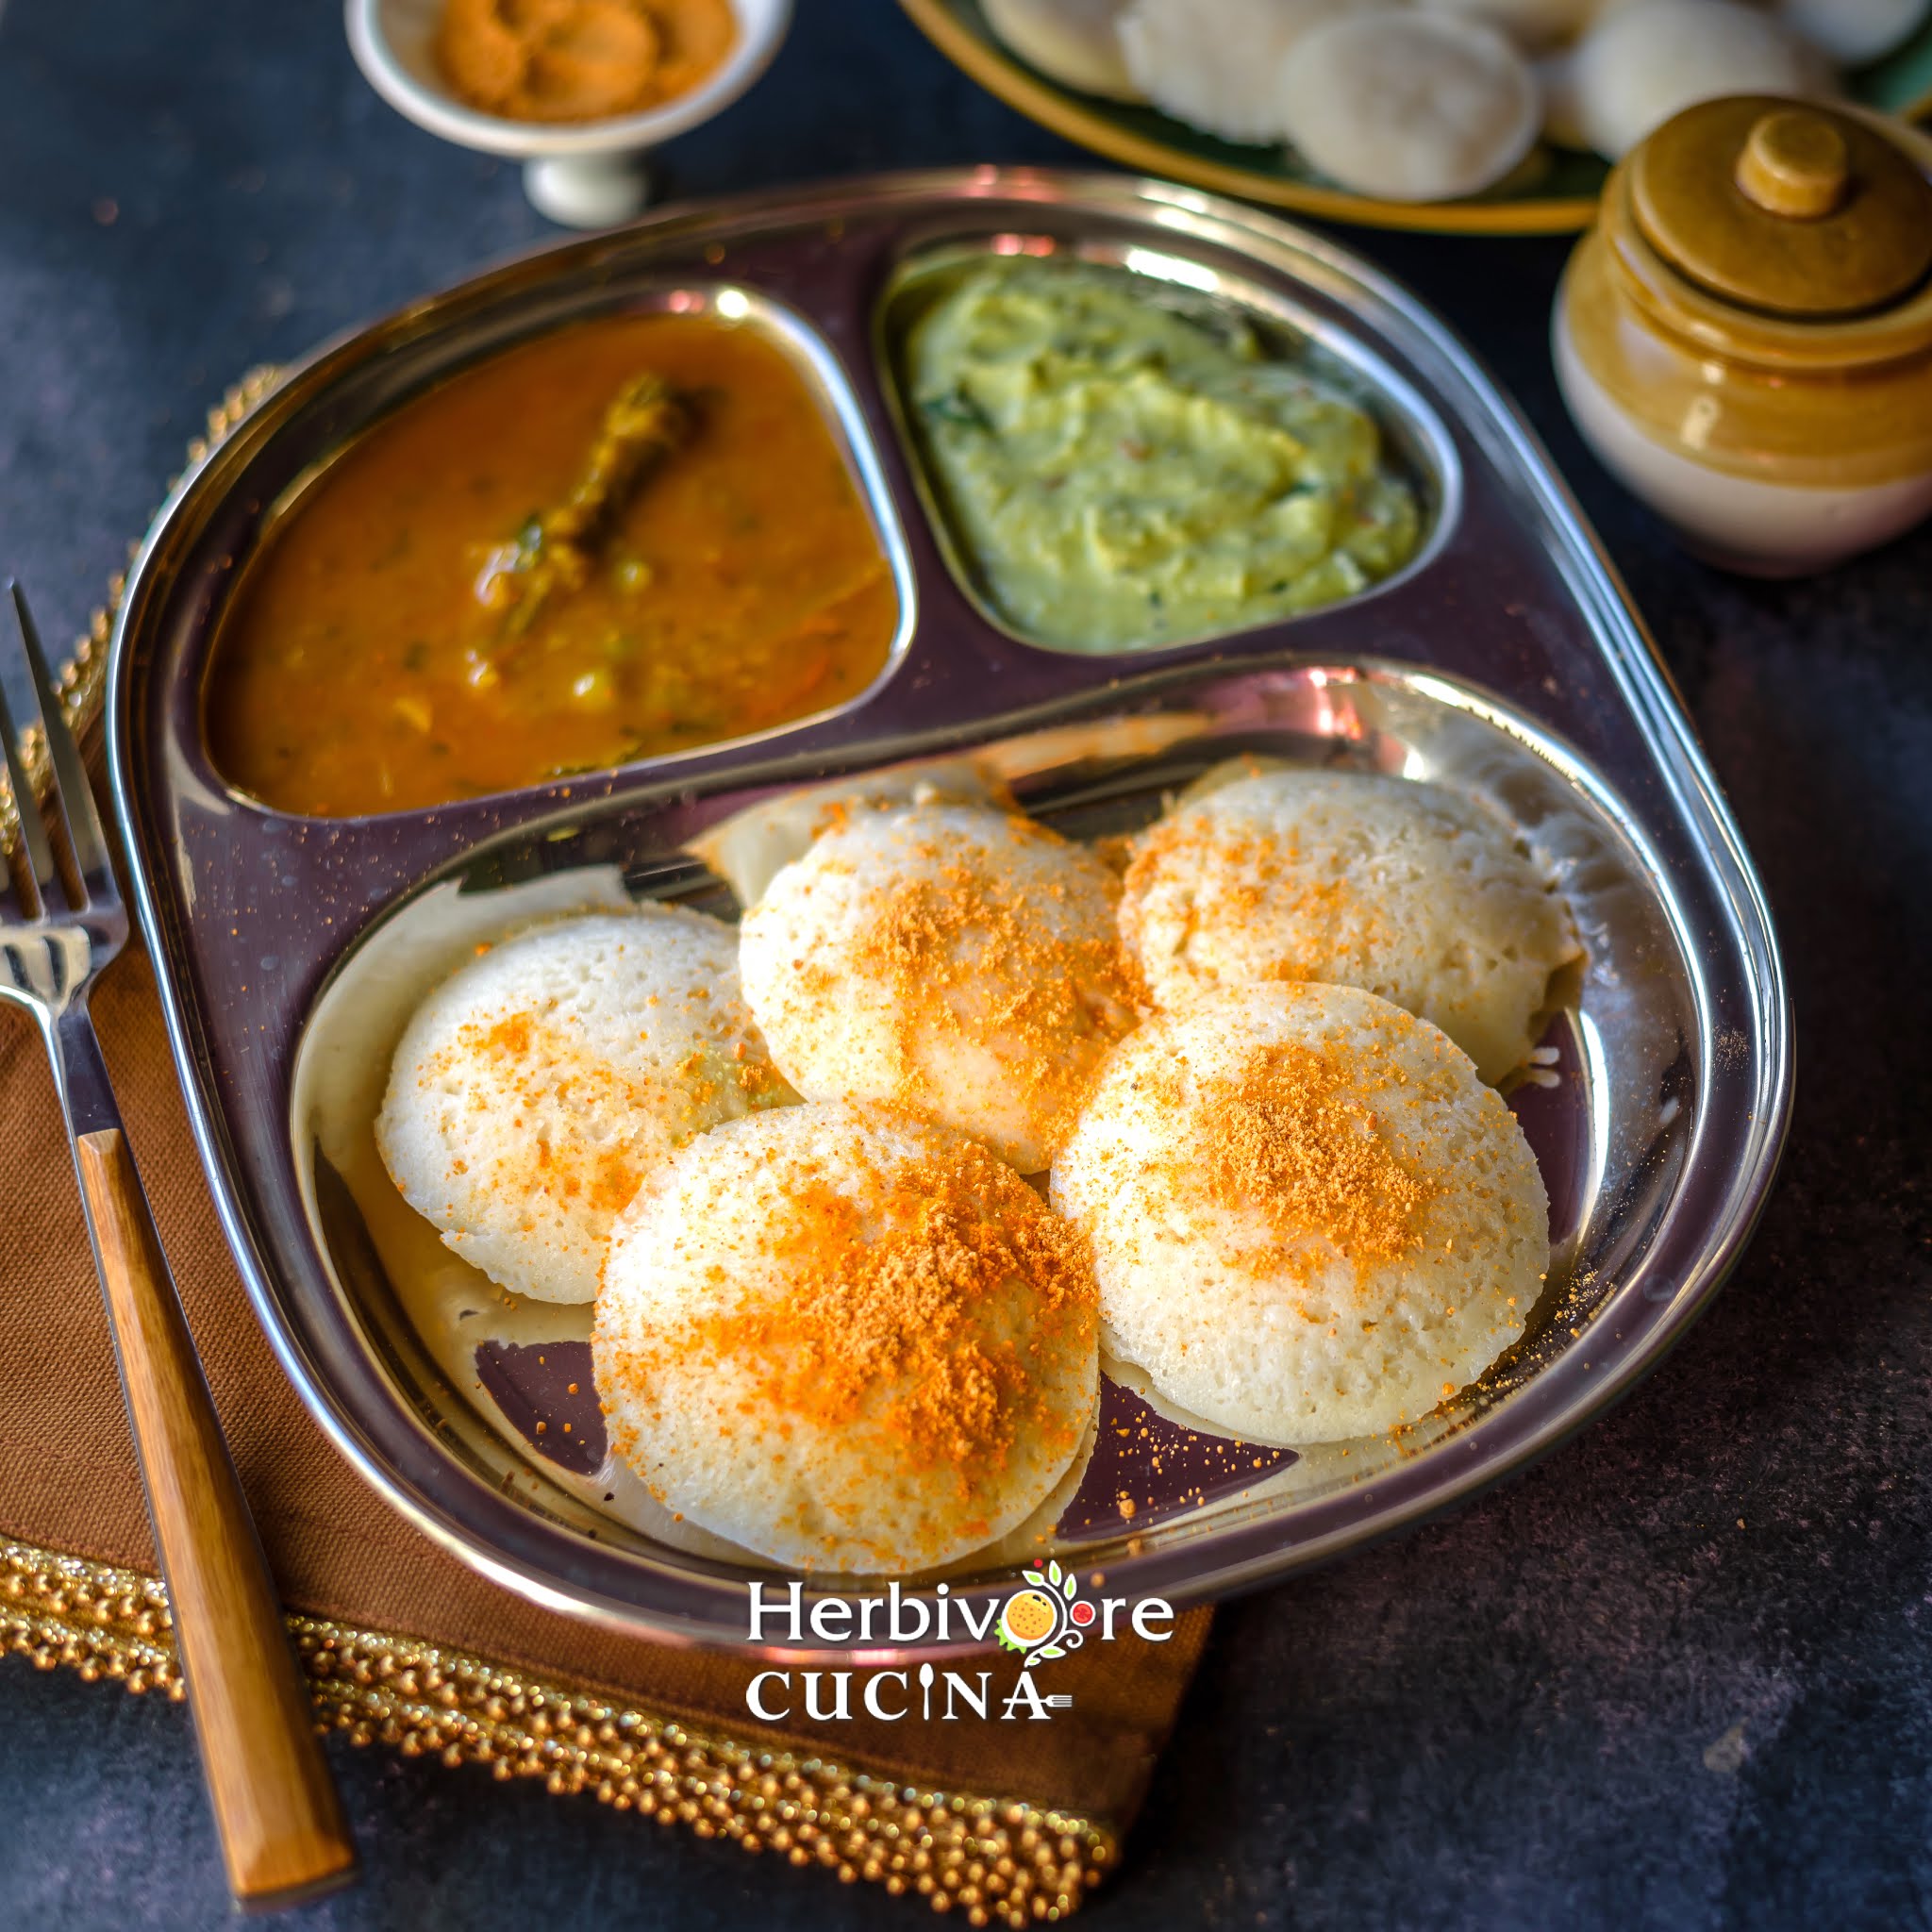
6- Serve these instant pot idli with Cilantro Coconut Chutney, Red Tomato Chutney, Red Pepper Chutney, Sambar and Sukha Coconut Chutney.
Expert Tips and Notes
Ingredient Notes
- Pick the right rice and dal: Traditionally idli rice is perfect for making idli and dosa. However, we can easily use any short grain rice. Sona Masoori is one such rice that works really well. When it comes to dal, urad dal is the perfect choice. Urad dal comes in various forms, whole with covering, whole without the cover and split. The covered ones tend to be black in color and make the batter gritty and dark. So use either the whole or split but dehusked dal. I generally stick to whole dal i.e. urad gota.
- Adding poha: Poha is often added to the idli batter. Poha makes the idli super soft. Again, we can either use thick or thin poha. Thin poha can be added to the blender directly and thick ones need about 30 minutes of soaking time. Skip these if unavailable, but I would strongly recommend using for the recipe.
- Why add methi: Methi or fenugreek seeds helps kick start the fermentation, especially in cold weather where we need something to start the process. Add whole methi or powdered methi for the recipe.
- The role of salt: Salt is added for taste and flavor. Moreover, it helps fermentation. However, be careful to add non-processed salt when adding before fermenting. Regular table salt or iodized salt are not ideal to add before fermentation as it stops the process. If using these, add them after fermenting the idli batter.
Process Notes
- Soaking rice and dal: It is best to soak the rice and dal separately. Do not soak them together, as they are best ground separate. Wash these well and soak in regular water. Do not use hot water as the grains start to cook in super hot water. Soak overnight or at least 8-10 hours.
- Grinding: We need to grind these separate. First grind the dal well and then the rice. We do it in this order as the dal is difficult to grind in a blender after rice. Use a high speed blender as it grinds it all well. And last, add as little water as possible to grind. We can always add more water but cannot remove it from the batter.
- Fermenting: The fermentation process is perfect to do in the instant pot. A timed recipe, this is sure shot to work in every weather. Always use a larger instant pot as we do not want the batter to overflow int the machine. A couple of ice cubes help maintain the temperature without cooking the batter while fermenting.
- Do not steam for a long time: Steaming the instant pot idli for a longer time than needed results in hard idlis. 10-12 minutes is the perfect sweet spot to make the idlis perfectly soft for a regular stand. Moreover, if using a mini idli stand, steam only for 8-10 minutes. The idli will be perfect.
Fermenting the batter without the Instant Pot
While the preferred way to ferment the batter is using the instant pot, we can do the same without using it too. Here are some popular ways to achieve it:
- Fermenting in warm weather: If the weather is warm where you live, simply make the batter and transfer it to a large glass or stainless steel container. It should be large enough to hold the fermented batter. Place covered on the kitchen counter for 12-13 hours so it ferments well.
- Using the oven: The other effective way any time of the year is the oven. Simply add the batter to a large container and and place on a baking tray. Cover and place this in the oven with a cover on top. Leave the light of the oven on and let the batter ferment.
- A hot case/ casserole: The other way is to keep the batter in an insulated hot case. Either add the batter directly to the hot case or place a container with the batter in it. Close the lid and let the batter ferment for 12-13 hours on the kitchen counter.
- Using the microwave: A slightly tedious method is to use the microwave; but it works well too. Simply place a cup of water in the microwave and heat it up for a minute till there is some steam in the microwave. Now, turn the microwave off and place the large bowl of batter in it. Close the door and let the batter ferment for 3-4 hours. Remove the batter, heat up the water for another minute and repeat the process till the batter is well fermented.
Recipe FAQs
Ideally idli batter is perfect to use when fermented for 12-13 hours. Try leaving it to ferment for another couple of hours. If it still does not ferment, simply stop the process. And use this batter with some ENO or baking soda to make Uttapam, Dhokla or Handvo. Do not ferment more than 15 hours else the batter will smell foul and develop a pink crust that is not safe to consume.
While idli rice does give the best idli; it is easy to substitute with any short grain rice. I prefer to use sona masoori rice in place of idli rice to make instant pot idli.
Yes certainly. The same batter makes great dosa and uttapam by the addition of water to make it spreadable. Moreover, use this instant pot idli batter to make dhokla, handvo or paniyaram.
Yes certainly. One way to make idli without a stand is to pour the batter in greased steel or glass bowls. Then add water to the insert of the instant pot, place a trivet and plate on it. Arrange the bowls and steam for 10-12 minutes. If the bowls are super large, steam longer till a toothpick comes out clean. Alternatively, simply add the batter to the plate placed on the trivet and steam. Cut the instant pot idli into pieces and serve.
Pairings
This idli pairs well with so many sides. Here are some of my favorites to serve with it.

More Idli Recipes

Love this recipe? Please leave a star rating in the recipe card below & if you REALLY like it, consider a review in the comments whilst you are there, thanks!

Instant Pot Idli - Fermented Rice Cakes
Ingredients
Instructions
To make the idli batter
- Add the urad dal in a large bowl. Rinse with tap water a couple of times (till the water runs clear).1 cup Urad Dal
- Soak in enough water to cover them completely and remain a couple of inches above it. Add in fenugreek seeds as well.1 tablespoon Fenugreek seeds
- Do the same with idli rice. Soak them in a separate container and set aside for 8-10 hours.3 cups Idli Rice
- If using thick poha, soak them in water 30 minutes before you are ready to grind the batter.3 tablespoon Poha
- In a high speed blender add drained urad dal and fenugreek seeds.
- Add only a little of the soaking water and grind till it is smooth.
- Transfer to the insert of the instant pot.
- In the same blender jar (without washing) add the drained rice and poha.
- Grind till smooth and transfer to the ground dal.
- Add salt (if using) and mix everything well. Also add in 2-3 cubes of ice.1½ tablespoon Salt
- Place the insert in the instant pot and set the mode to yogurt and normal. Adjust the time to 10 hours and cover with a glass cover. Let this stand for 10 hours.
- After the time has passed, check of the batter has fermented. If not, let it ferment for another 1 hour.
- Open the lid and transfer to a bowl.
To make the idlis
- Add water in the instant pot insert and set it to 'saute'. Let the water come to a boil.
- Meanwhile, grease the idli stand with oil or non-stick spray.2-3 tablespoon Oil
- Spoon in some batter in each of the cavities.
- Place the idli stand in the instant pot. Set the mode of the Instant Pot to Steam and vent to venting. The time required to steam the idlis is 10 minutes.
- After the idlis have steamed, remove the stand and transfer the idlis to a plate.
- Serve these instant pot idli with Cilantro Coconut Chutney, Red Tomato Chutney, Red Pepper Chutney, Sambar and Sukha Coconut Chutney.
Notes
- Pick the right rice and dal: Traditionally idli rice is perfect for making idli and dosa. However, we can easily use any short grain rice. Sona Masoori is one such rice that works really well. When it comes to dal, urad dal is the perfect choice. Urad dal comes in various forms, whole with covering, whole without the cover and split. The covered ones tend to be black in color and make the batter gritty and dark. So use either the whole or split but dehusked dal. I generally stick to whole dal i.e. urad gota.
- Adding poha: Poha is often added to the idli batter. Poha makes the idli super soft. Again, we can either use thick or thin poha. Thin poha can be added to the blender directly and thick ones need about 30 minutes of soaking time. Skip these if unavailable, but I would strongly recommend using for the recipe.
- Why add methi: Methi or fenugreek seeds helps kick start the fermentation, especially in cold weather where we need something to start the process. Add whole methi or powdered methi for the recipe.
- The role of salt: Salt is added for taste and flavor. Moreover, it helps fermentation. However, be careful to add non-processed salt when adding before fermenting. Regular table salt or iodized salt are not ideal to add before fermentation as it stops the process. If using these, add them after fermenting the idli batter.
- Soaking rice and dal: It is best to soak the rice and dal separately. Do not soak them together, as they are best ground separate. Wash these well and soak in regular water. Do not use hot water as the grains start to cook in super hot water. Soak overnight or at least 8-10 hours.
- Do not steam for a long time: Steaming the instant pot idli for a longer time than needed results in hard idlis. 10-12 minutes is the perfect sweet spot to make the idlis perfectly soft for a regular stand. Moreover, if using a mini idli stand, steam only for 8-10 minutes. The idli will be perfect.
- Fermenting: The fermentation process is perfect to do in the instant pot. A timed recipe, this is sure shot to work in every weather. Always use a larger instant pot as we do not want the batter to overflow int the machine. A couple of ice cubes help maintain the temperature without cooking the batter while fermenting.
- Grinding: We need to grind these separate. First grind the dal well and then the rice. We do it in this order as the dal is difficult to grind in a blender after rice. Use a high speed blender as it grinds it all well. And last, add as little water as possible to grind. We can always add more water but cannot remove it from the batter.


Pavani says
Oh my Smruthi, using IP sounds like the solution to all my idli fermentation problems - I am going to try this method right away. Idli turned out so soft and fluffy.
Kankana Saxena says
Avyan loves Idli and most often I buy the batter or get lucky when my friend drops homemade ones. Do you use one of those traditional wet grinder or you think vitamix could do that too?
Ami says
please give consistency example for the batter using video- this doesn't quite help. Also what mark should the batter be in instant pot? container? Thank you.